WHMCS Billing Module for XtreamUI
Overview
This module allows Users to be auto-provisioned instantly on payment for XtreamUI. Automates the adding of credits for Reseller's and Users.
Requirements
Requirements are the same as WHMCS.
Requirement Minimum Recommended PHP Version 7.2 Latest 7.3 or 7.4 Release PHP Memory Limit 64MB 128MB**
Installation and Configuration
Downloading and Uploading
In this tutorial we will show you how to successfully install ProjectX For XtreamUI. We will guide you step by step through the whole installation and configuration process.
1. Log in to our client area and download the module.
2. In the downloaded file you might find one or two packages that support different PHP versions. In the most recent versions of the module, you will find only one package that supports PHP 7.2 and later.
3. Extract the package and upload its contents
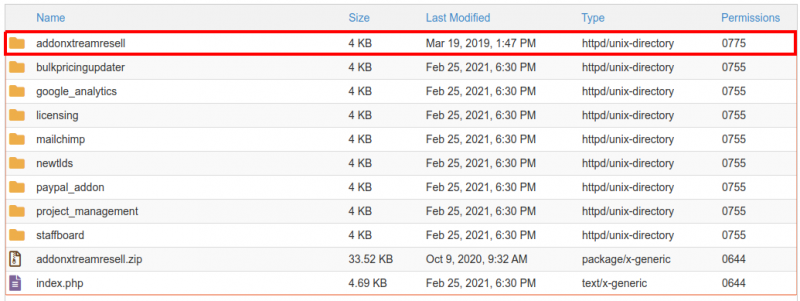
addonxuiresell will be uploaded to whmcs/modules/addons
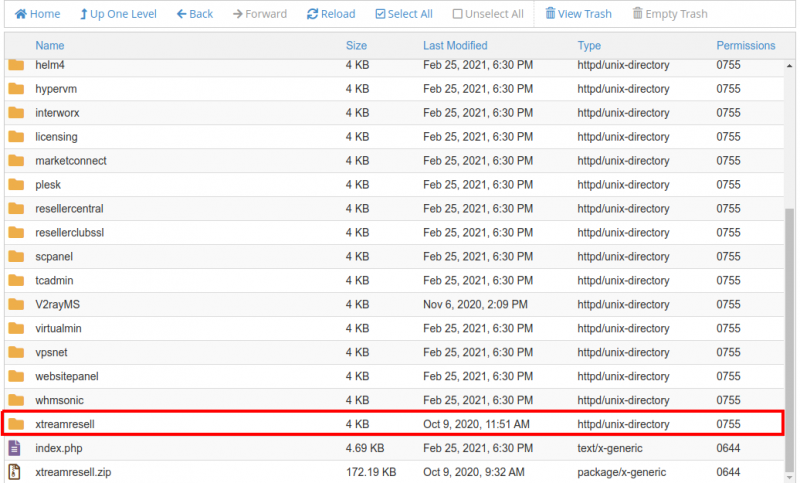
xuiresell will be uploaded to whmcs/modules/servers
The content of the package to upload should look like this.
How to License
4. Log in to our client area and get your license key.
5. In Whmcs go to "System Settings" > "Addon Modules".
6. Click Activate.
7. Click Configure.
8. Paste your License Key in, Check the box "Full Administrator" and click Save.
How to Configure
9. In order to create and configure a product, go to 'System Settings' → 'Products/Services'.
10. Click "Create New Group" and click save.
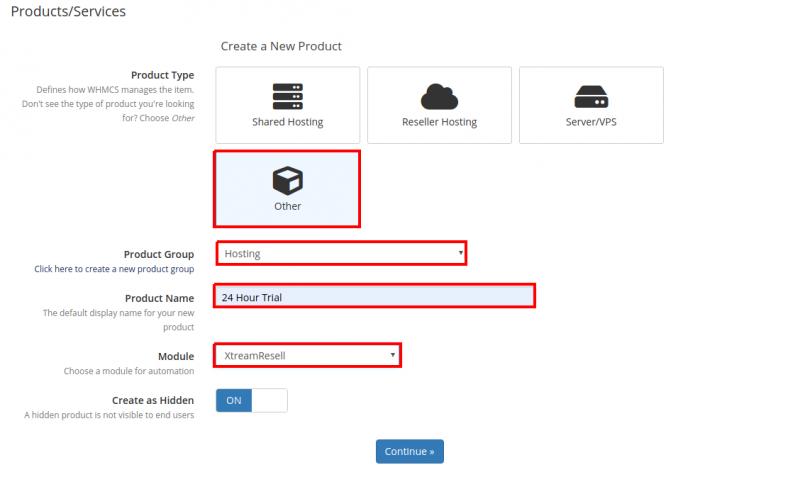
11. Click "Create a New Product".
12. Fill in the above information. Make sure you select "XtreamResell" as the module. Click Continue.
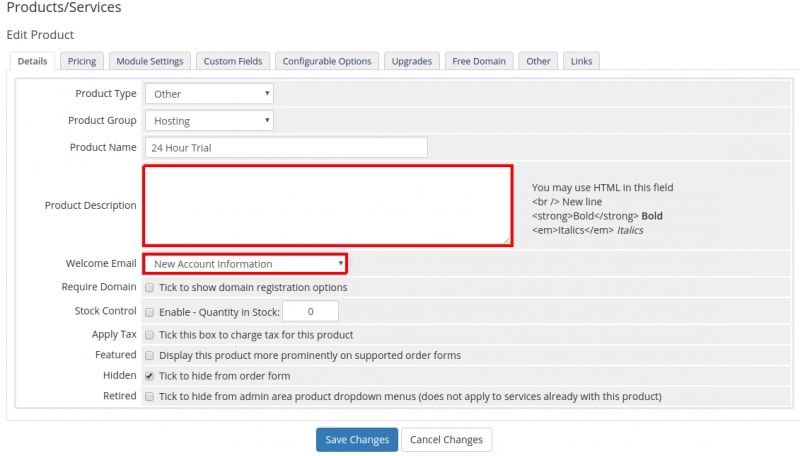
13. Fill in product Description. You can leave Welcome email as the default. We will setup a Email template later and you can come back and change the Welcome Email. Click continue.
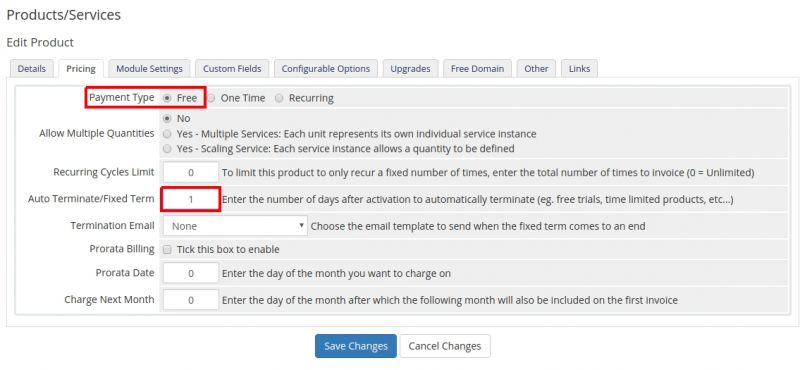
14. If the product is for a free trial you would use the above settings. "Auto Terminate/Fixed Term" is the number of days to auto terminate the product. If its a 24 hour trial you would set that to 1 and 2 for 48 hours. Leave that as 0 for Paid Subscriptions.
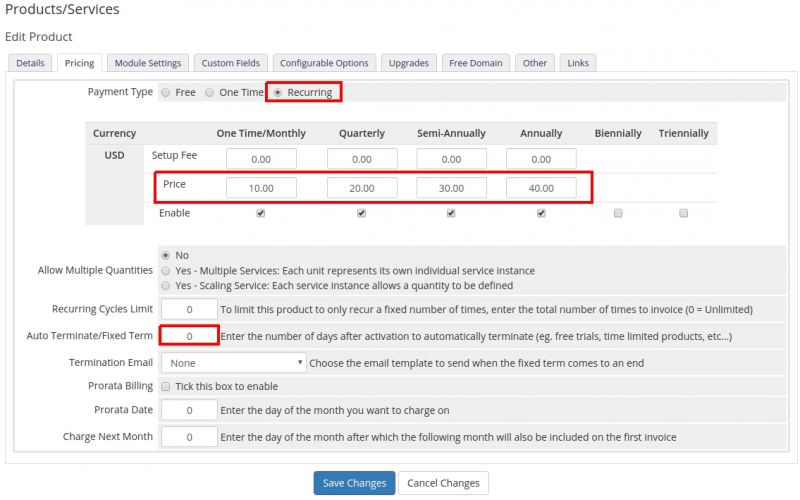
15. For Paid subscriptions you would use something similar to the above. Select "Recurring". The customer would then receive Recurring invoices on a Monthly, Quarterly etc, etc period. Set your pricing. Make sure "Auto Terminate/Fixed Term" is set to 0. Click save changes.
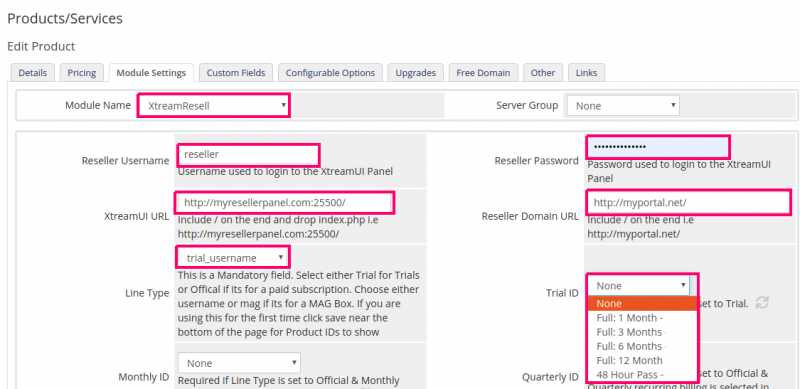
16. Fill in the below information. make sure you add a / of the end of your url's. If you are setting up a trial and wish to select all trial products from the panel select "trial_username". Click save. Your Trial products will now show in the drop down boxes
17. Note for "trial_username" I have selected the contents of the "Trial_ID" drop down box. If its a trial you must select that drop down box.
19. If you don't want the user to choose their own username or password you can check these boxes. This will generate a "Numeric" username and password. We did this because people find it easier to read numbers then complex randomly generated alpha, numeric ones.
20. Because this is a free trial we select "Automatically setup the product as soon as an order is placed" and click save.
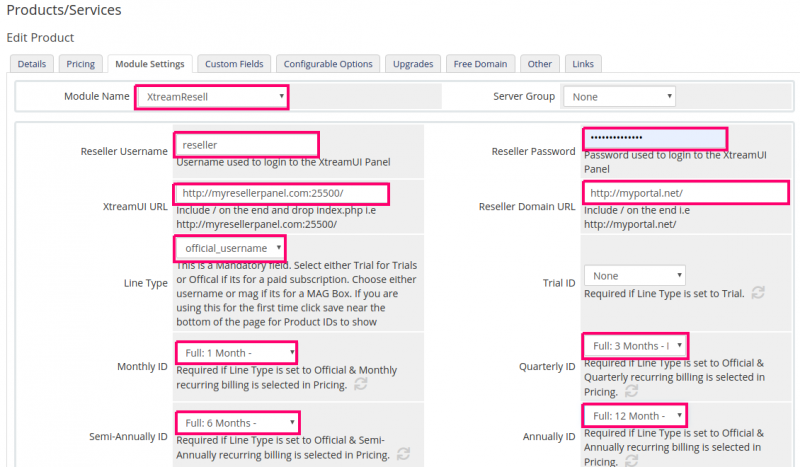
21. For Paid Subscriptions. We select "official_username" for "Line Type". We then select products from the drop down boxes. NOTE: in the previous tab where you added your prices they should match. i.e If you only set Monthly pricing then you will only setup Monthly here.
21. Because this is a paid subscription we set "Automatically setup the product as soon as the first payment is received". So once whmcs receives payment it will automatically setup the user.
22. In the next tab "Custom Fields". in the field "Field Name" enter "Username" NOTE: Its starts with a capital U. If the line is for a mac you would enter "MAC" here. NOTE: All in capitals.(if you are setting up a mac in the previous step you would select "official_mac or trial_mac from the "line Type" drop down box. If you want the user to choose their own username you would check all three boxes. "Required Field" "Show on Order Form" "Show on Invoice". If you selected "Random Username" in the previous section you will only check. "Required Field" "Show on Invoice" If you want to use the password generated by XUI make sure in the previous section you have not checked "Random Username" and select "Required Field" "Show on Invoice" here.
23. Click "save" your product has now been setup.
Working with captchas
ProjectX for XtreamUI has the ability to solve Captchas should your panel be protected by one. Please complete the following.
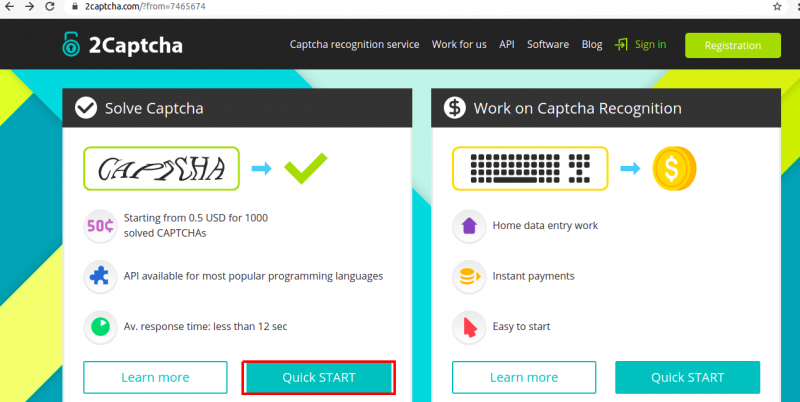
24. Register with 2captcha here and add credits. Prices are very reasonable. Starting from 0.5 USD for 1000 solved CAPTCHAs
https://2captcha.com?from=7465674
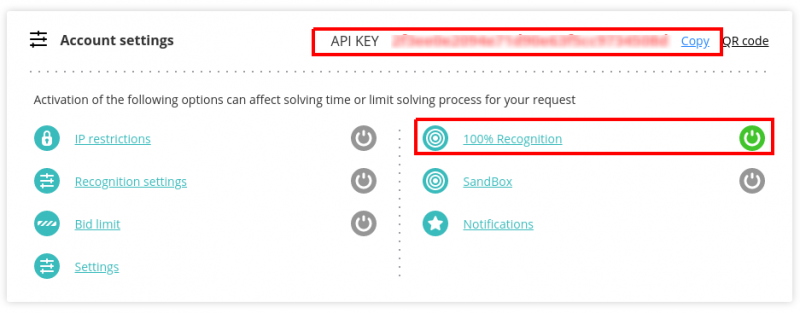
25. Once Signed up go to your dashboard and copy your "API Key" and enable "100 recognition".
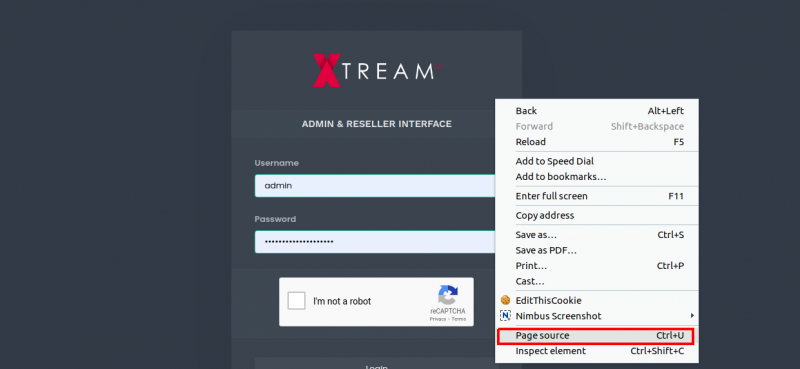
26. Go to your panel login screen and "right click" anywhere on the page and click "Page Source".
27. look for div class="g-recaptcha" id="verification" data-sitekey="############################"></div copy the numbers between the brackets where i have put #####################
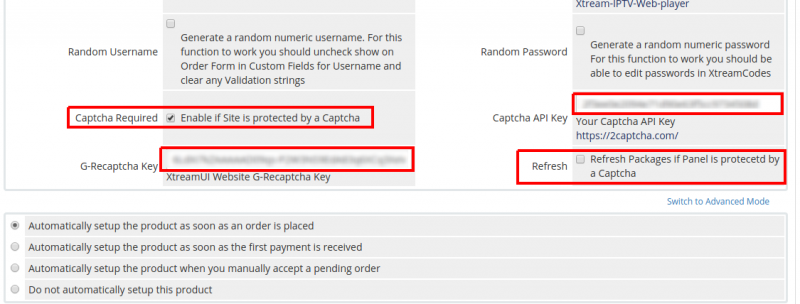
28. Now to go to your module settings. In the field "Captcha API Key" put the api key from 2captcha. In the "G-Recaptcha Key" put the key you copied from your Panel page source. Check the box "Captcha Required" and Check the box "Refresh" and click save. NOTE: You only click "Refresh" once. This will force ProjectX to login to your panel to get your products. This could take up to a minute to complete. If nothing has happend by then just close go back to "products and services" and reopen the module again. Refresh should auto uncheck once your products have been retrieved.

