FR-XrayR Manager
Complete setup guide for the FR-XrayR Manager WHMCS addon module — server management, inbounds, templates, and product integration.
Installing FR-XrayR Manager in WHMCS
Module Overview
FR-XrayR Manager is a comprehensive WHMCS addon that lets you manage XrayR proxy servers and FreeRADIUS authentication directly from your WHMCS admin panel. It automates server provisioning, user management, and subscription delivery for VPN/proxy services.
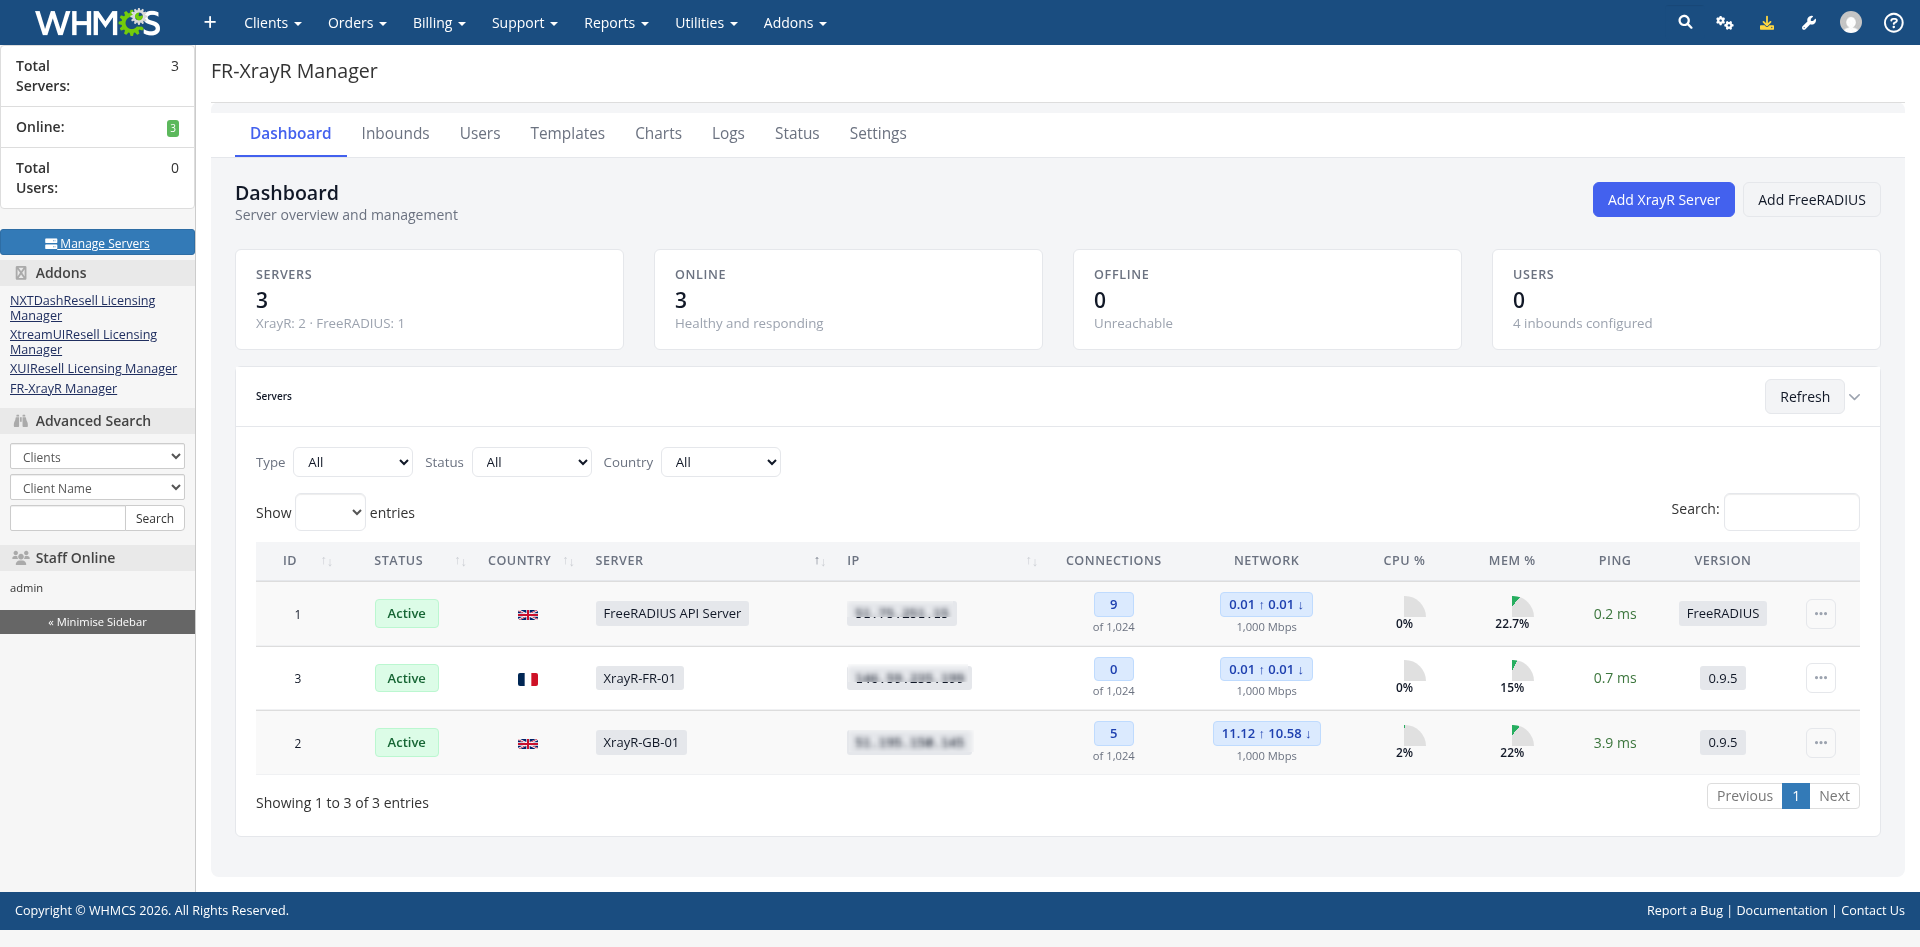
Server Dashboard
Monitor all your servers at a glance — see online status, connections, CPU & memory usage, ping, and version information. Add FreeRADIUS API servers and XrayR nodes with one-click installation.
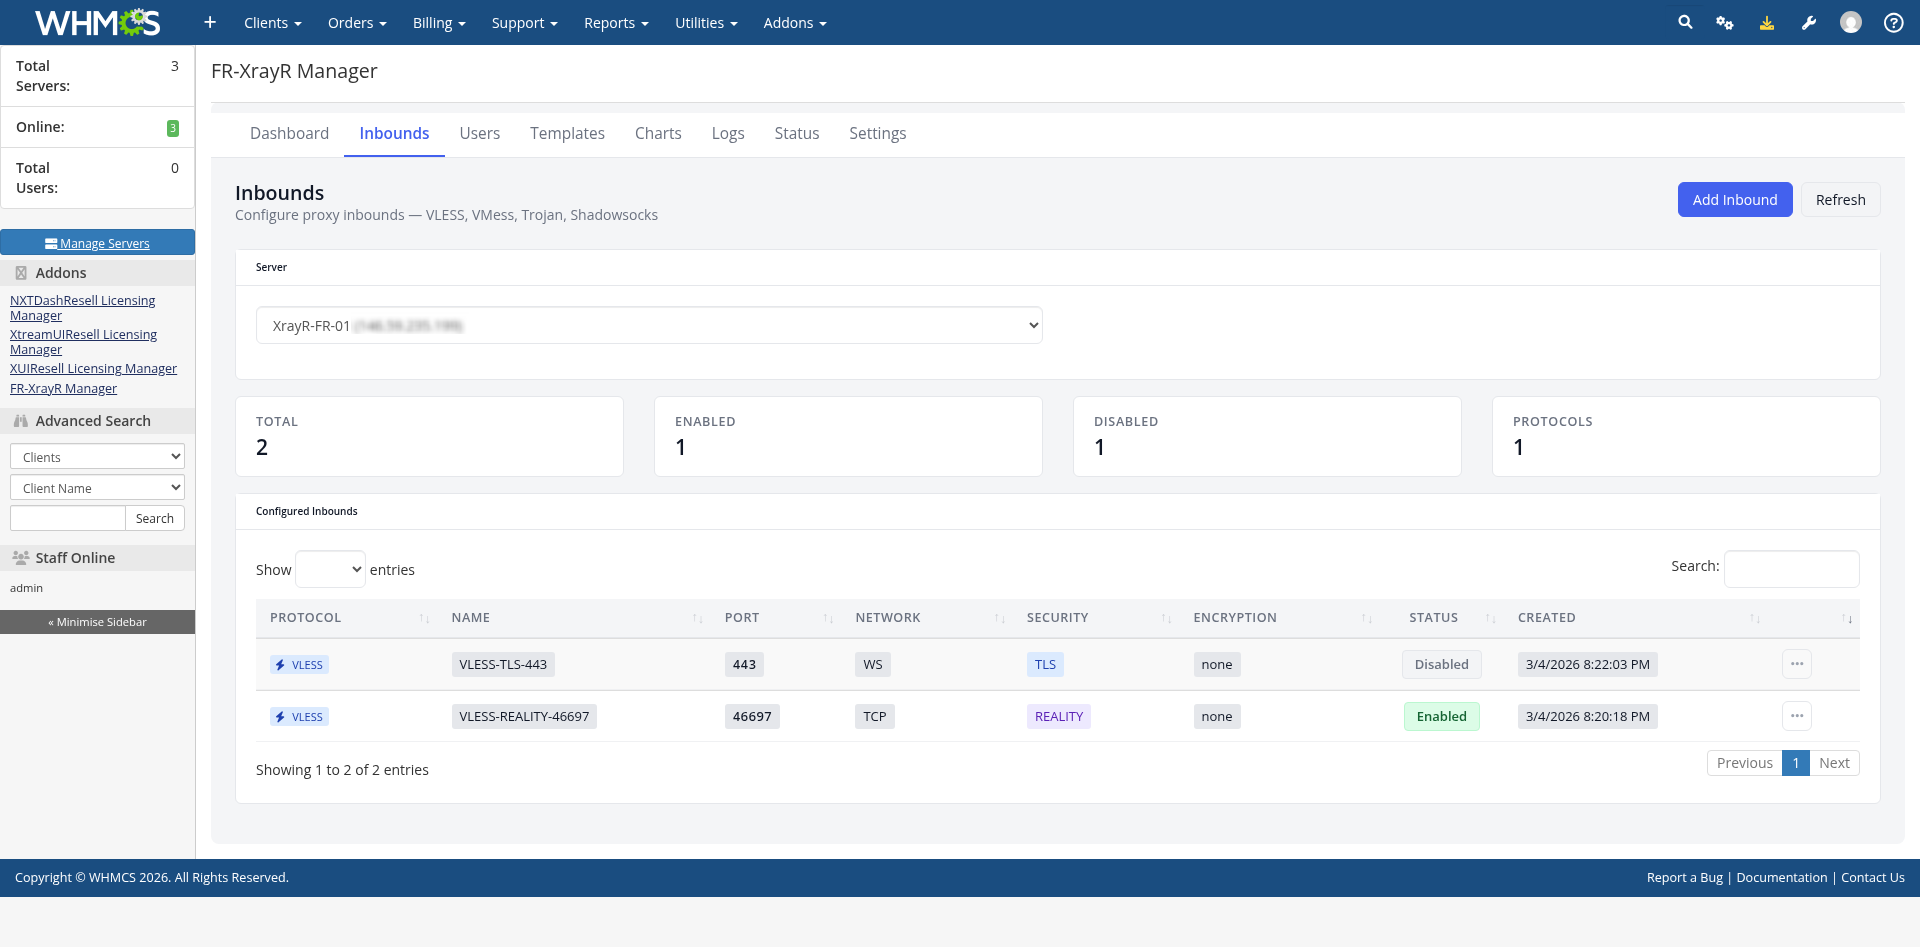
Inbound Configuration
Configure proxy inbounds per server with support for VLESS, VMess, Trojan, and Shadowsocks protocols. Choose from presets like VLESS + REALITY or VLESS + TLS + WebSocket, with full control over network transport, security, and encryption settings.
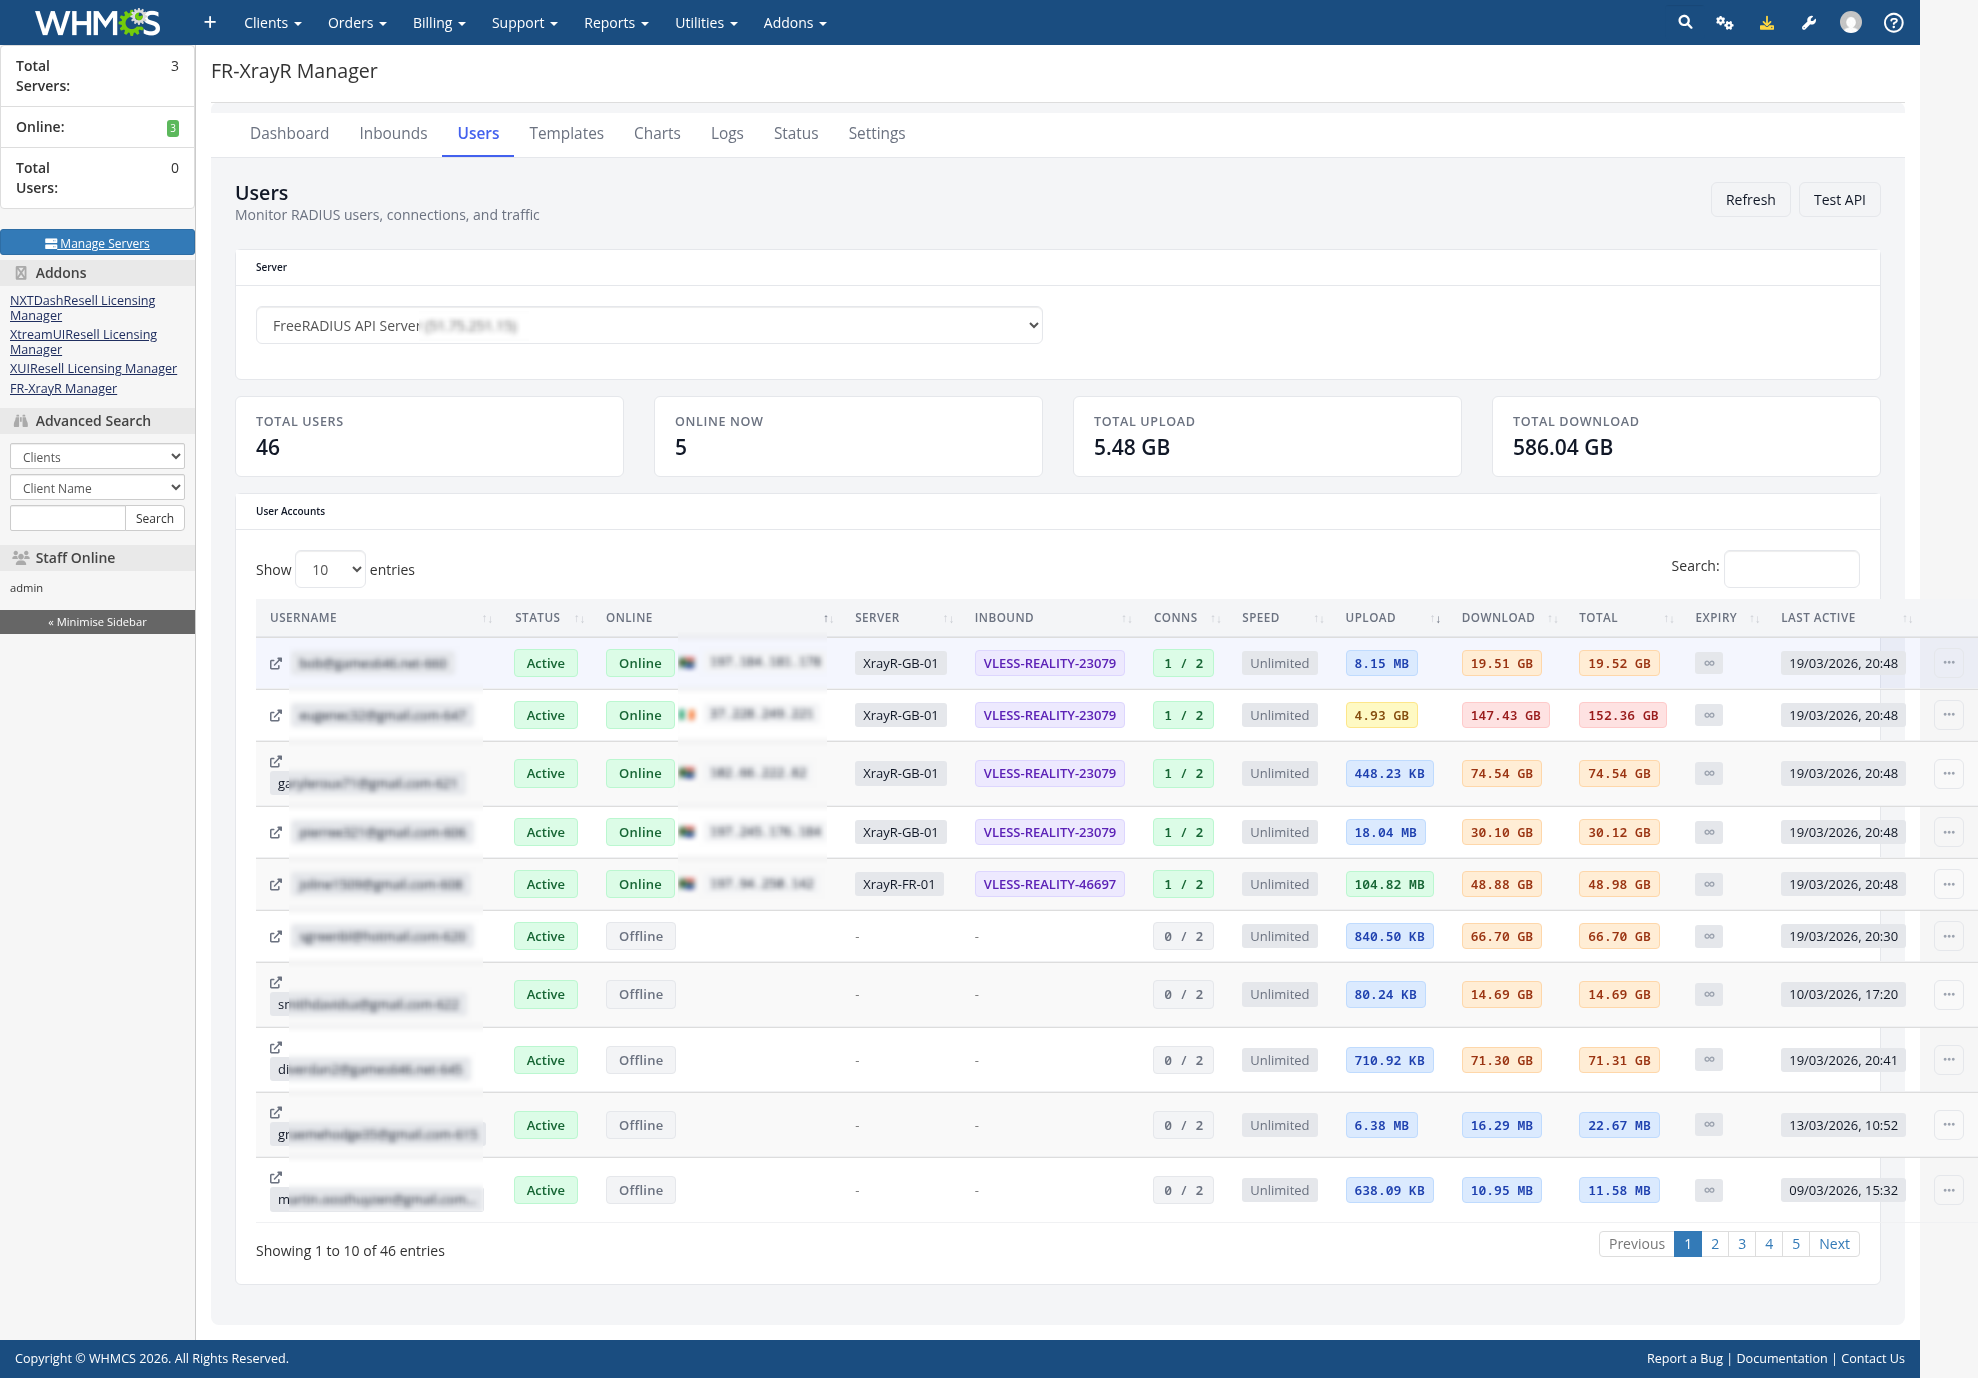
User Management
View all provisioned users with real-time status, connection details, assigned servers and inbounds, speed limits, and bandwidth usage. Click any user to see their detailed traffic history with interactive graphs.
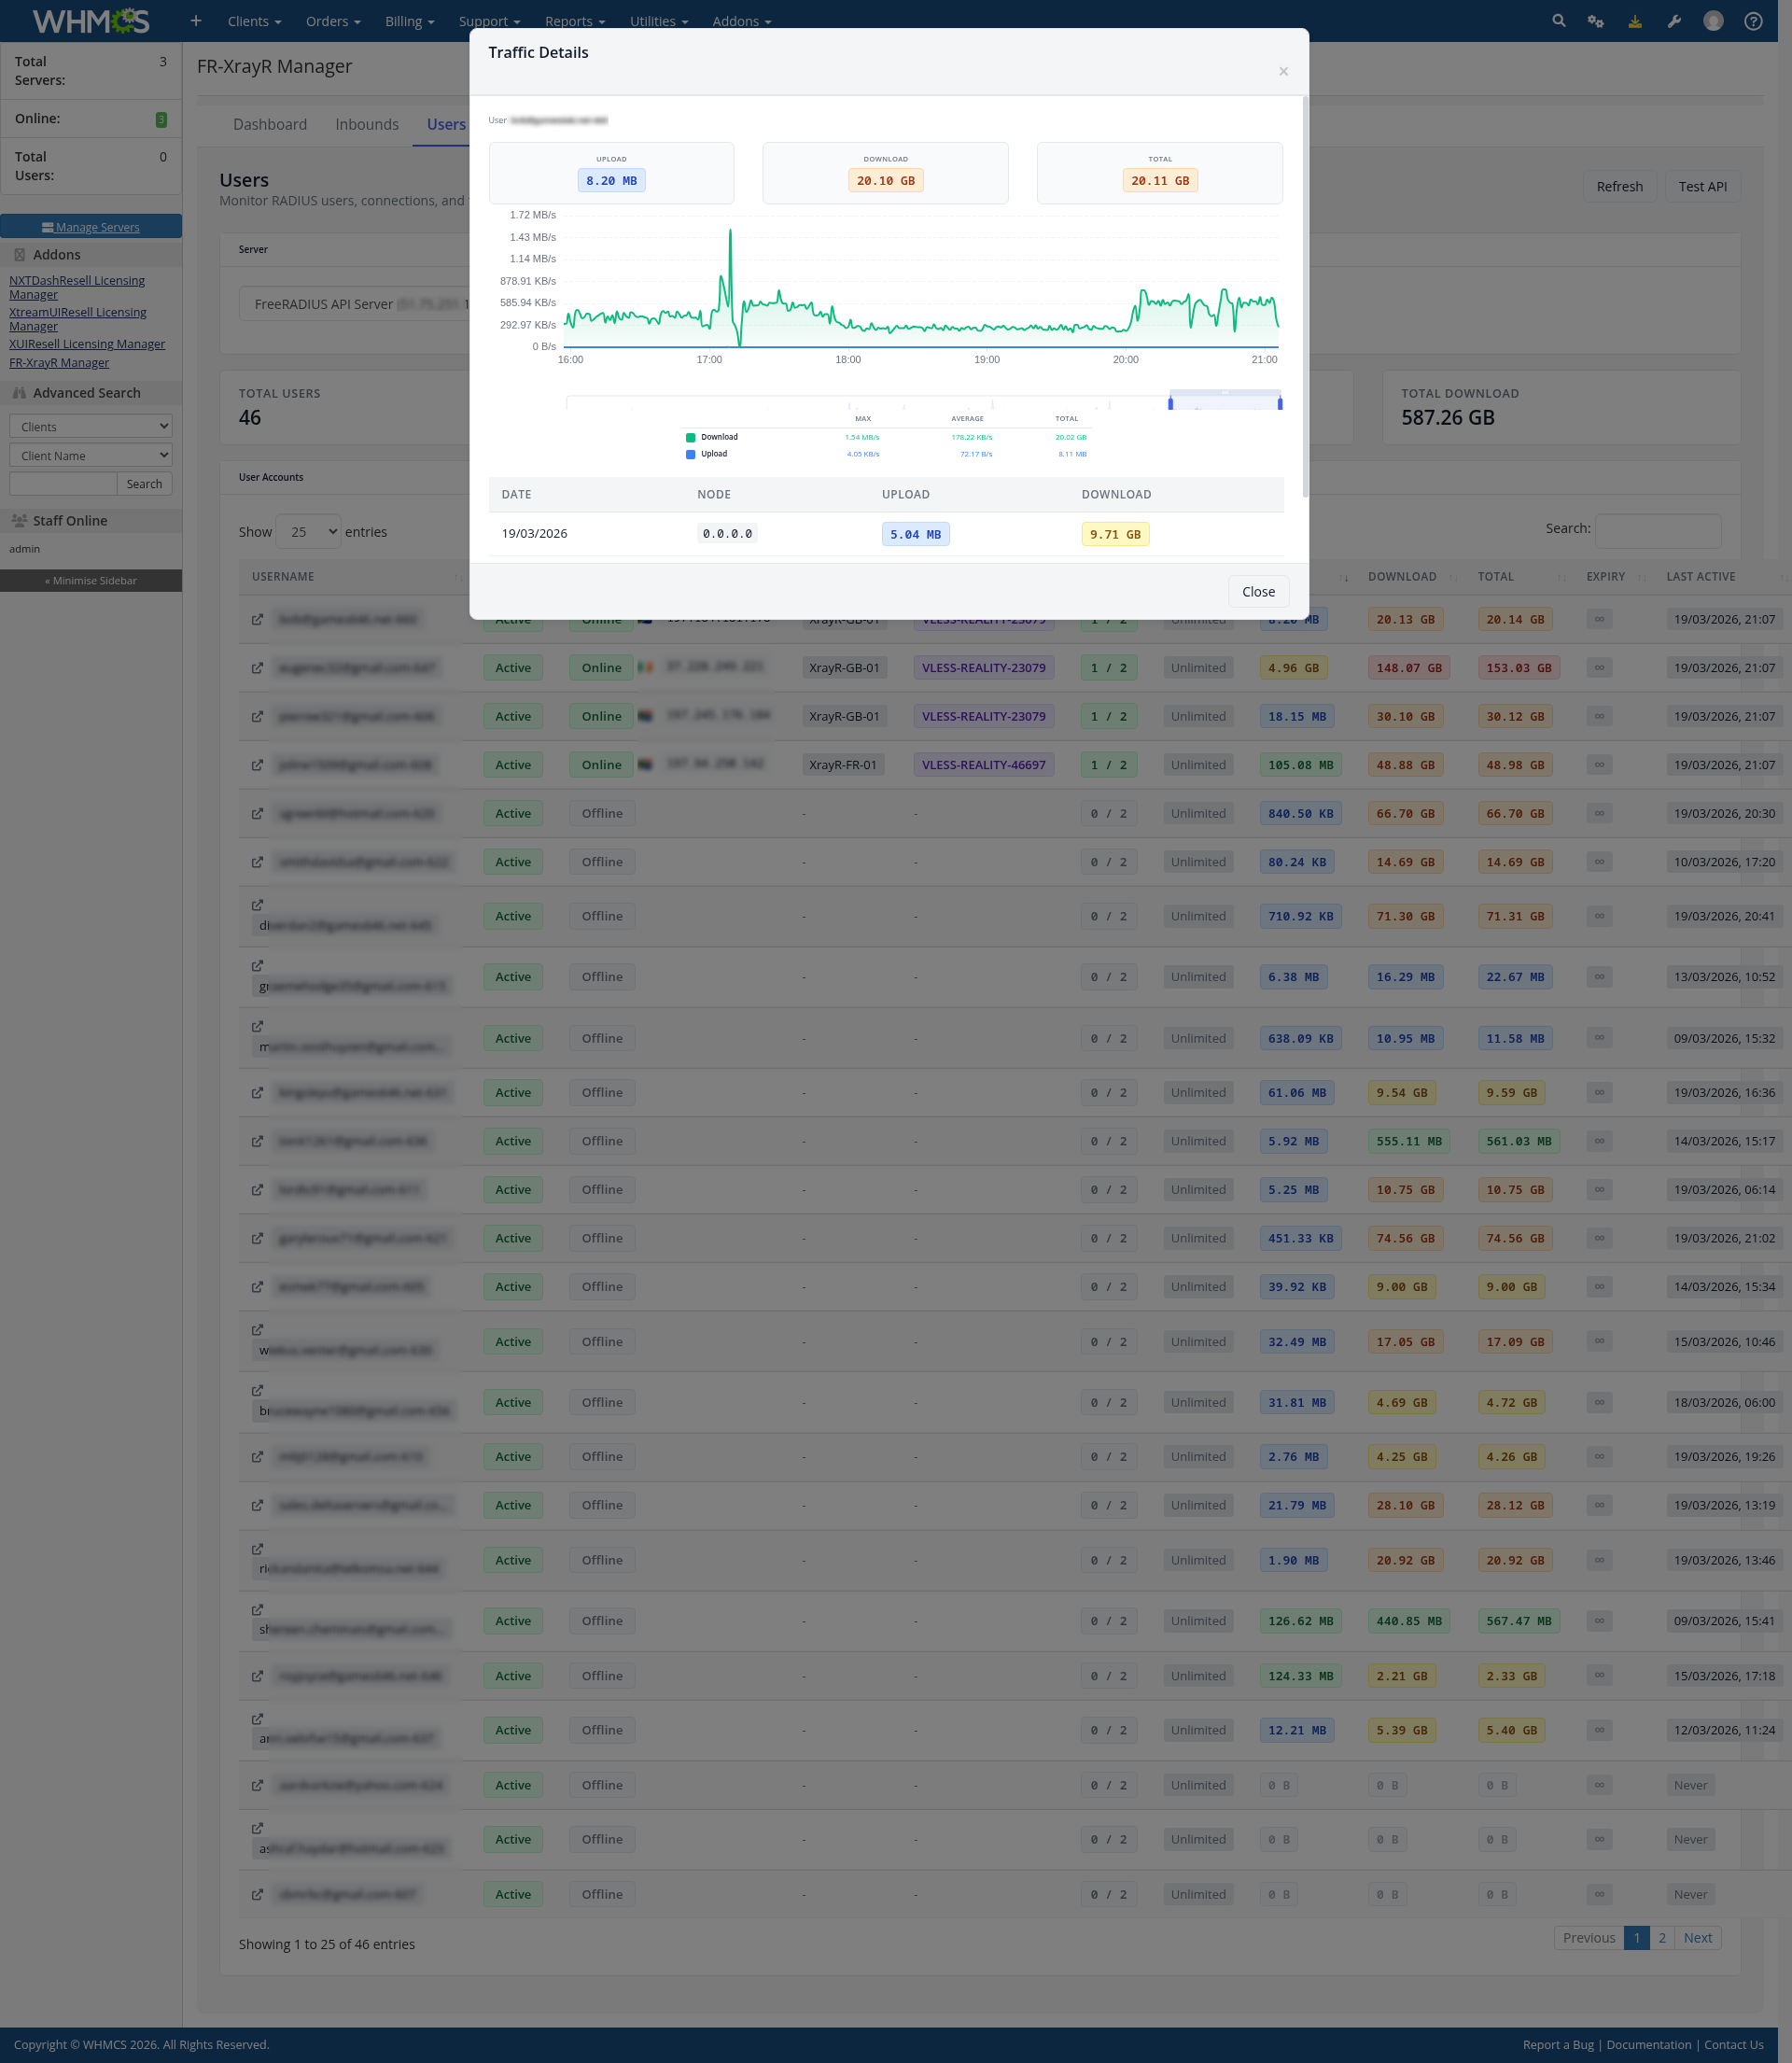
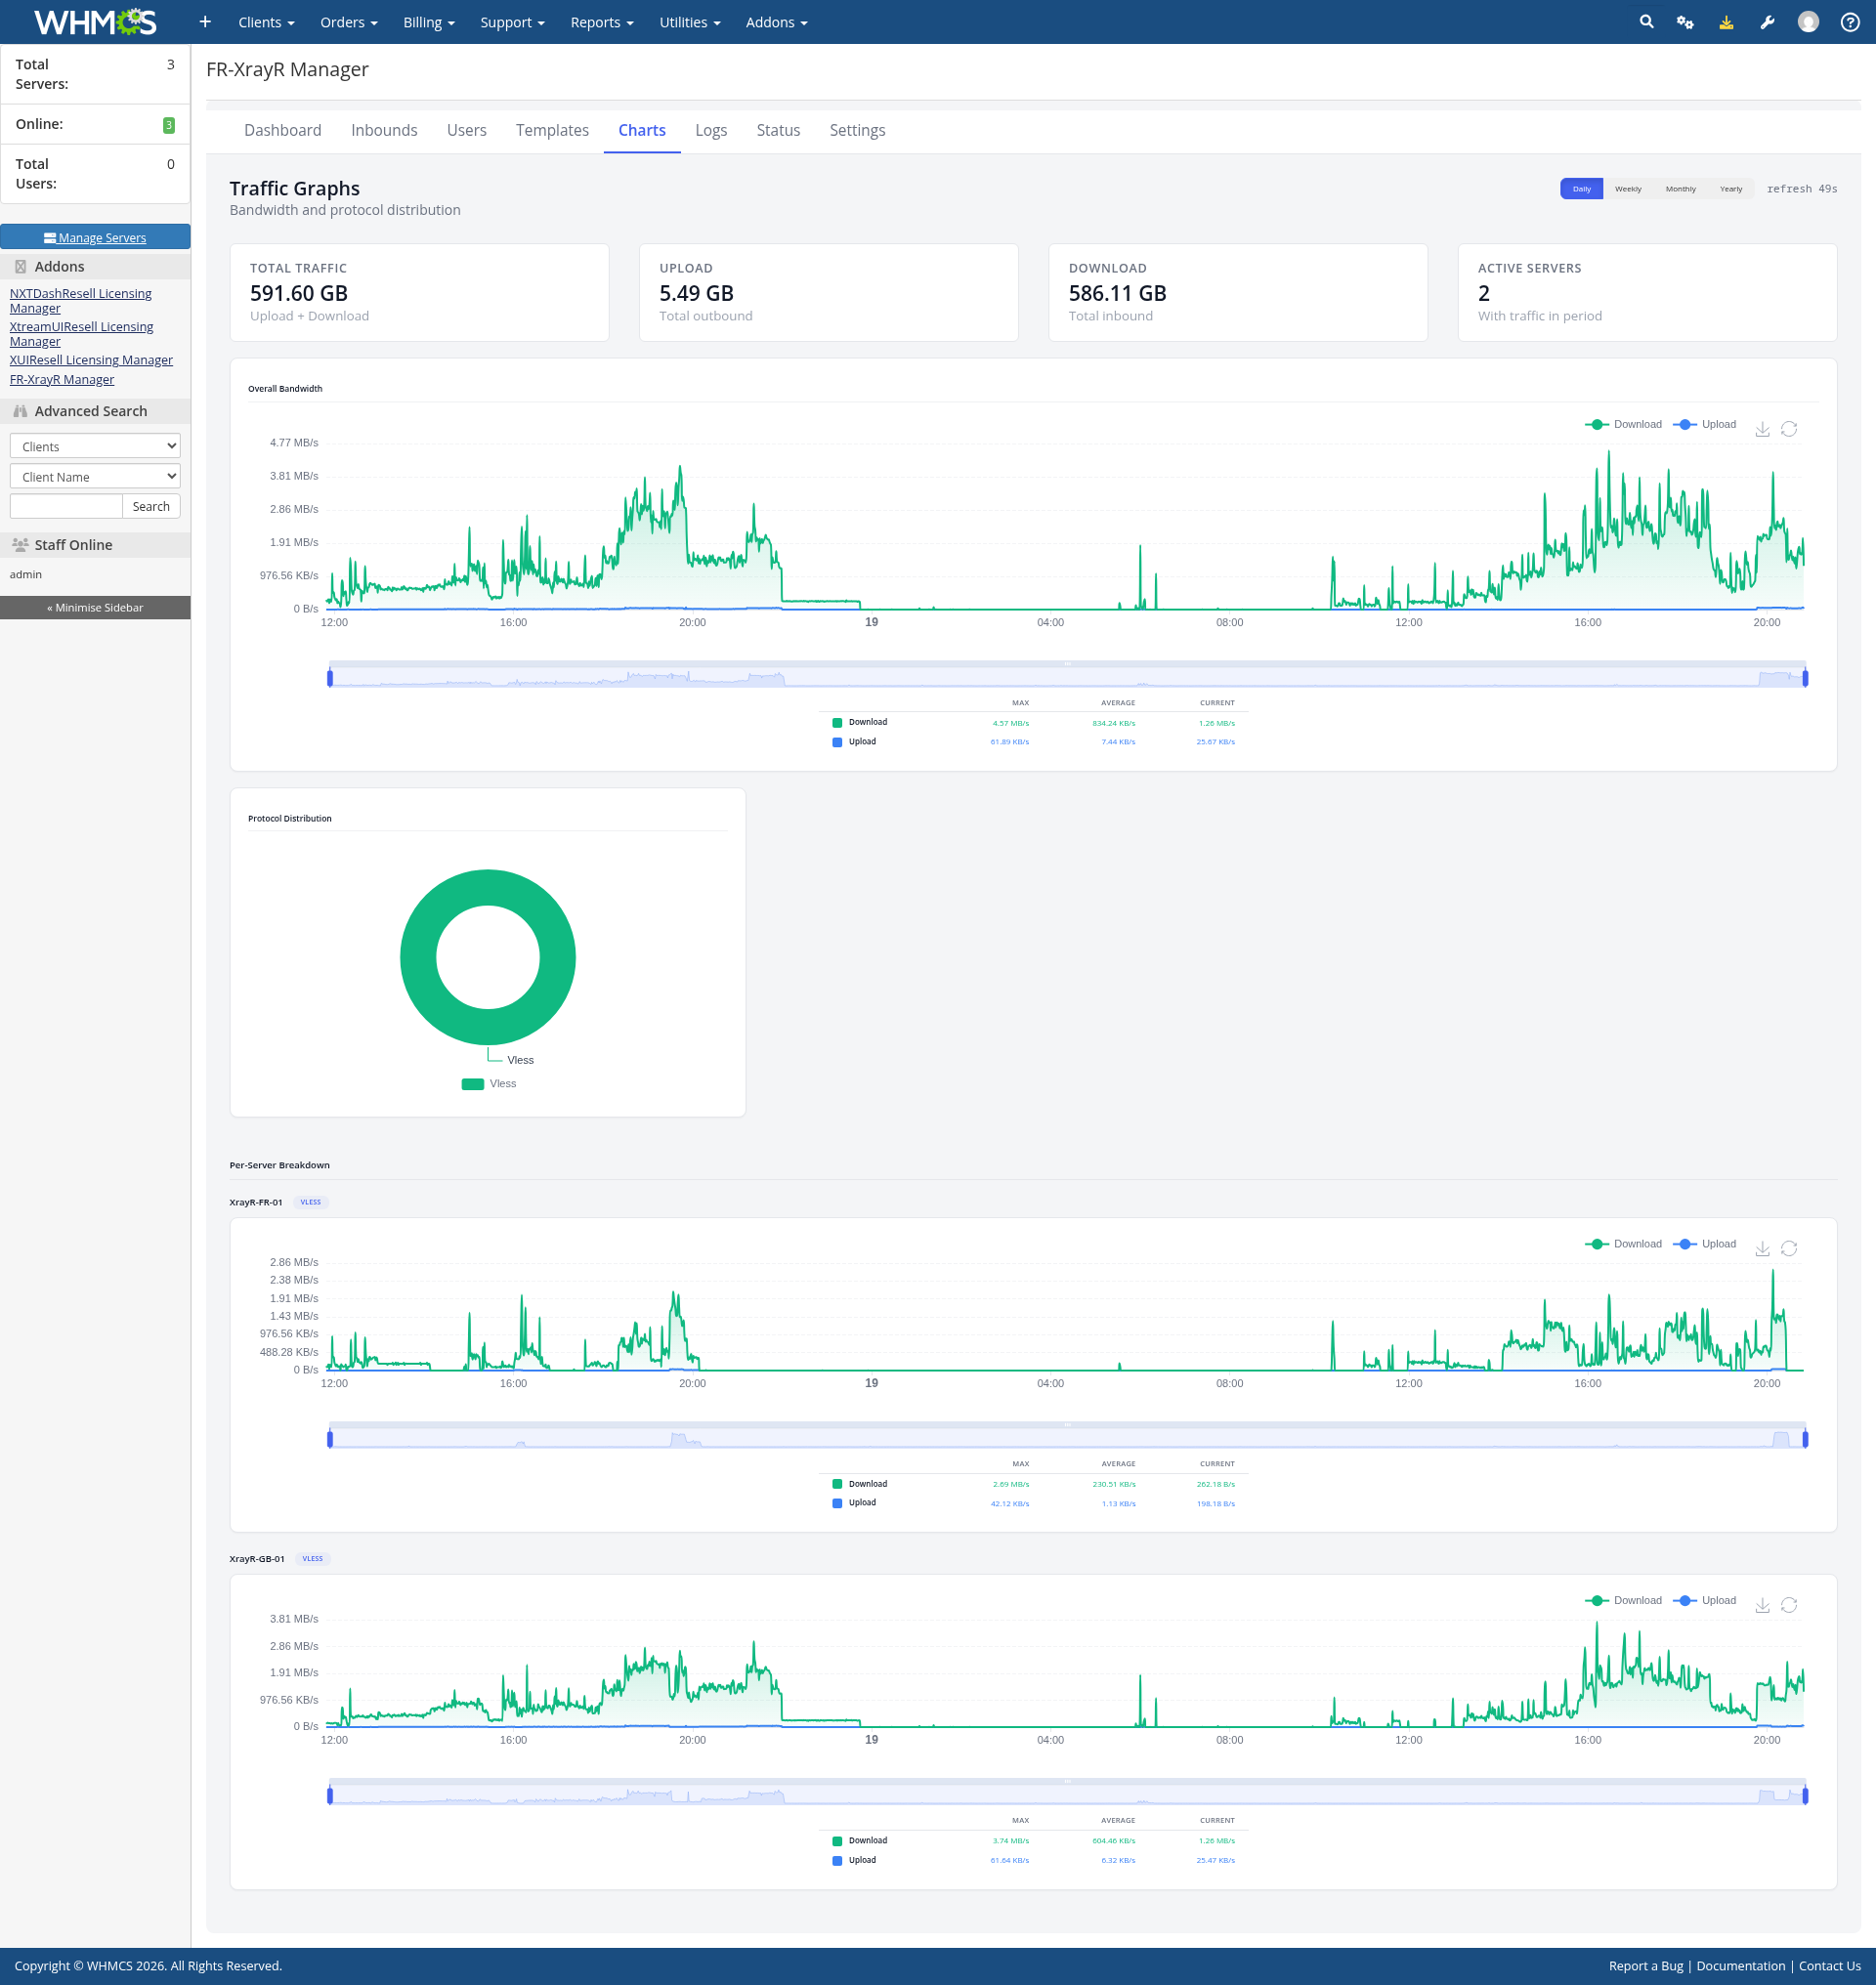
Traffic Charts
Visualize traffic across your entire network with detailed graphs. See total traffic, upload/download breakdown, protocol distribution, and per-node traffic over time.
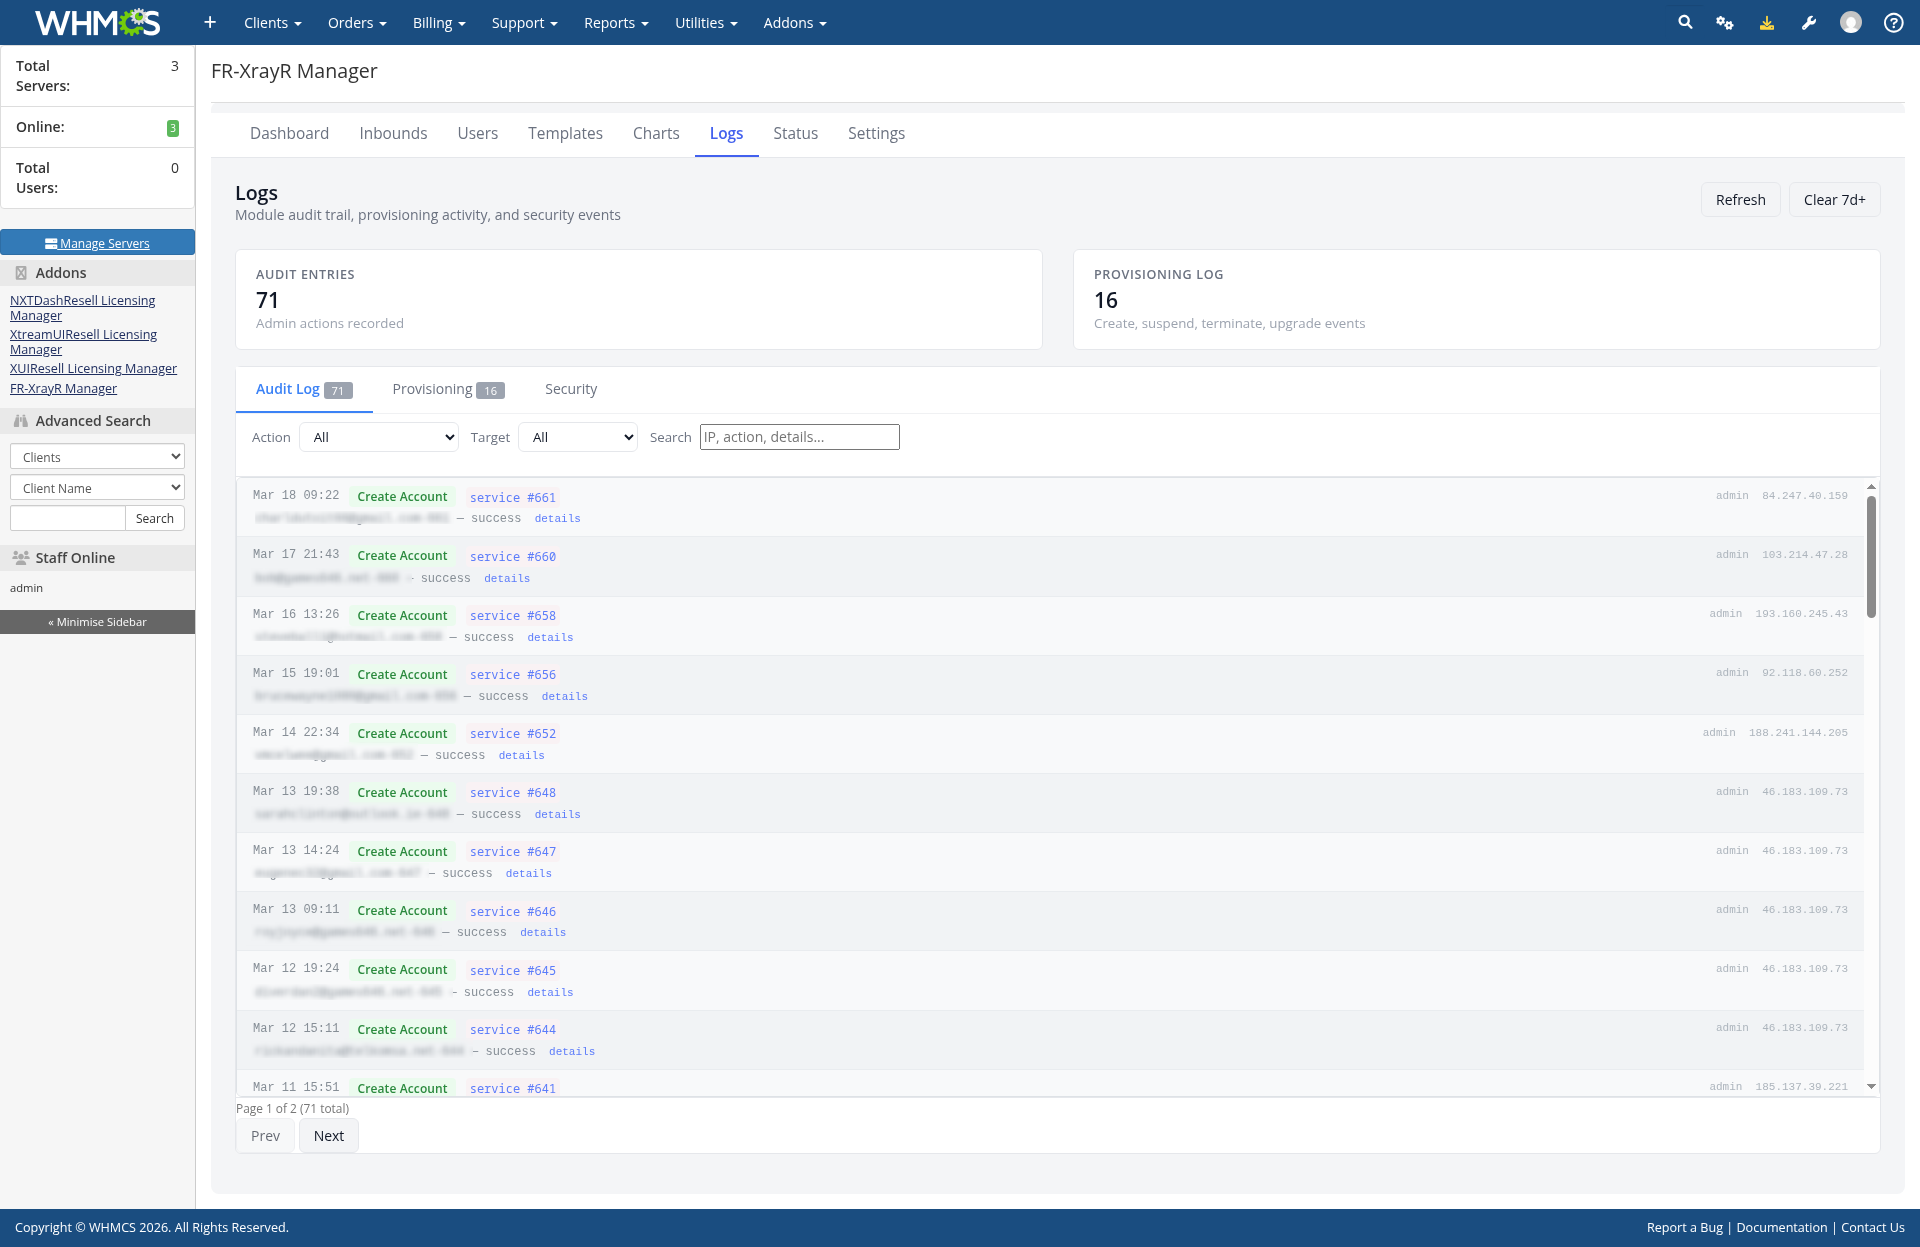
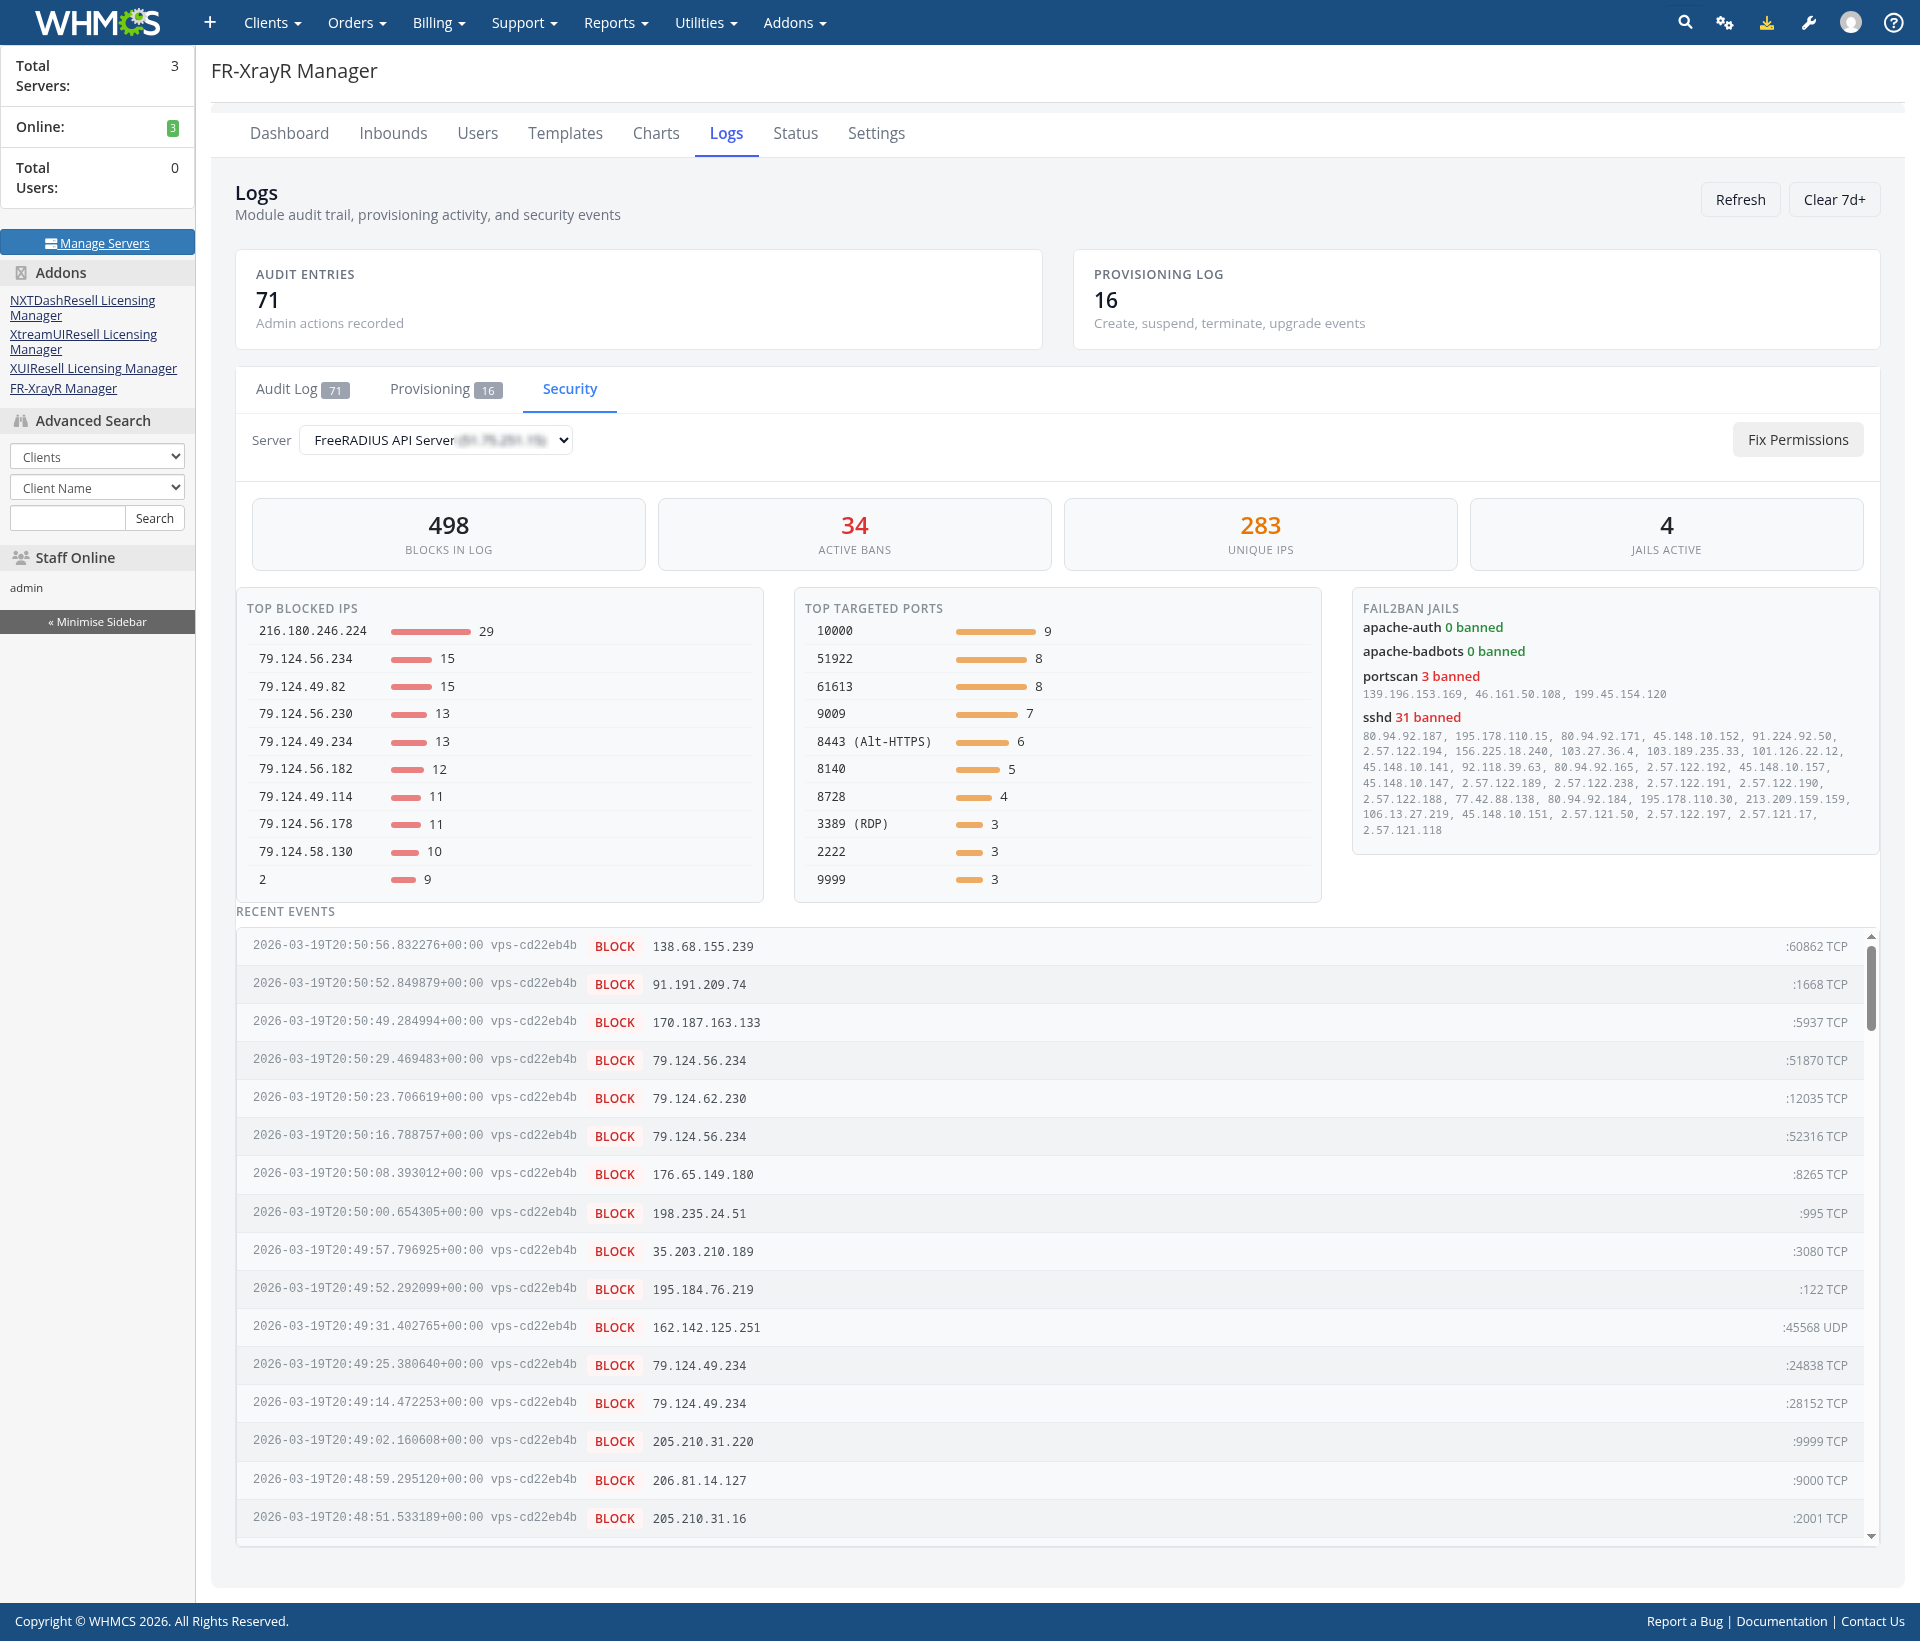
Audit & Security Logs
Full audit trail of all provisioning events (account creation, suspension, termination) and security monitoring with firewall statistics — blocked IPs, targeted ports, and active firewall rules.
Installation Guide
Follow the steps below to install and configure FR-XrayR Manager in your WHMCS installation.
Prerequisites
- A working WHMCS installation (v7.x or later)
- FR-XrayR Manager module files uploaded to
modules/addons/xresellxrayaddon/ - A valid license key (from your XtreamResell purchase)
- A FreeRADIUS server with SSH access (root)
- One or more VPS servers for XrayR nodes with SSH access
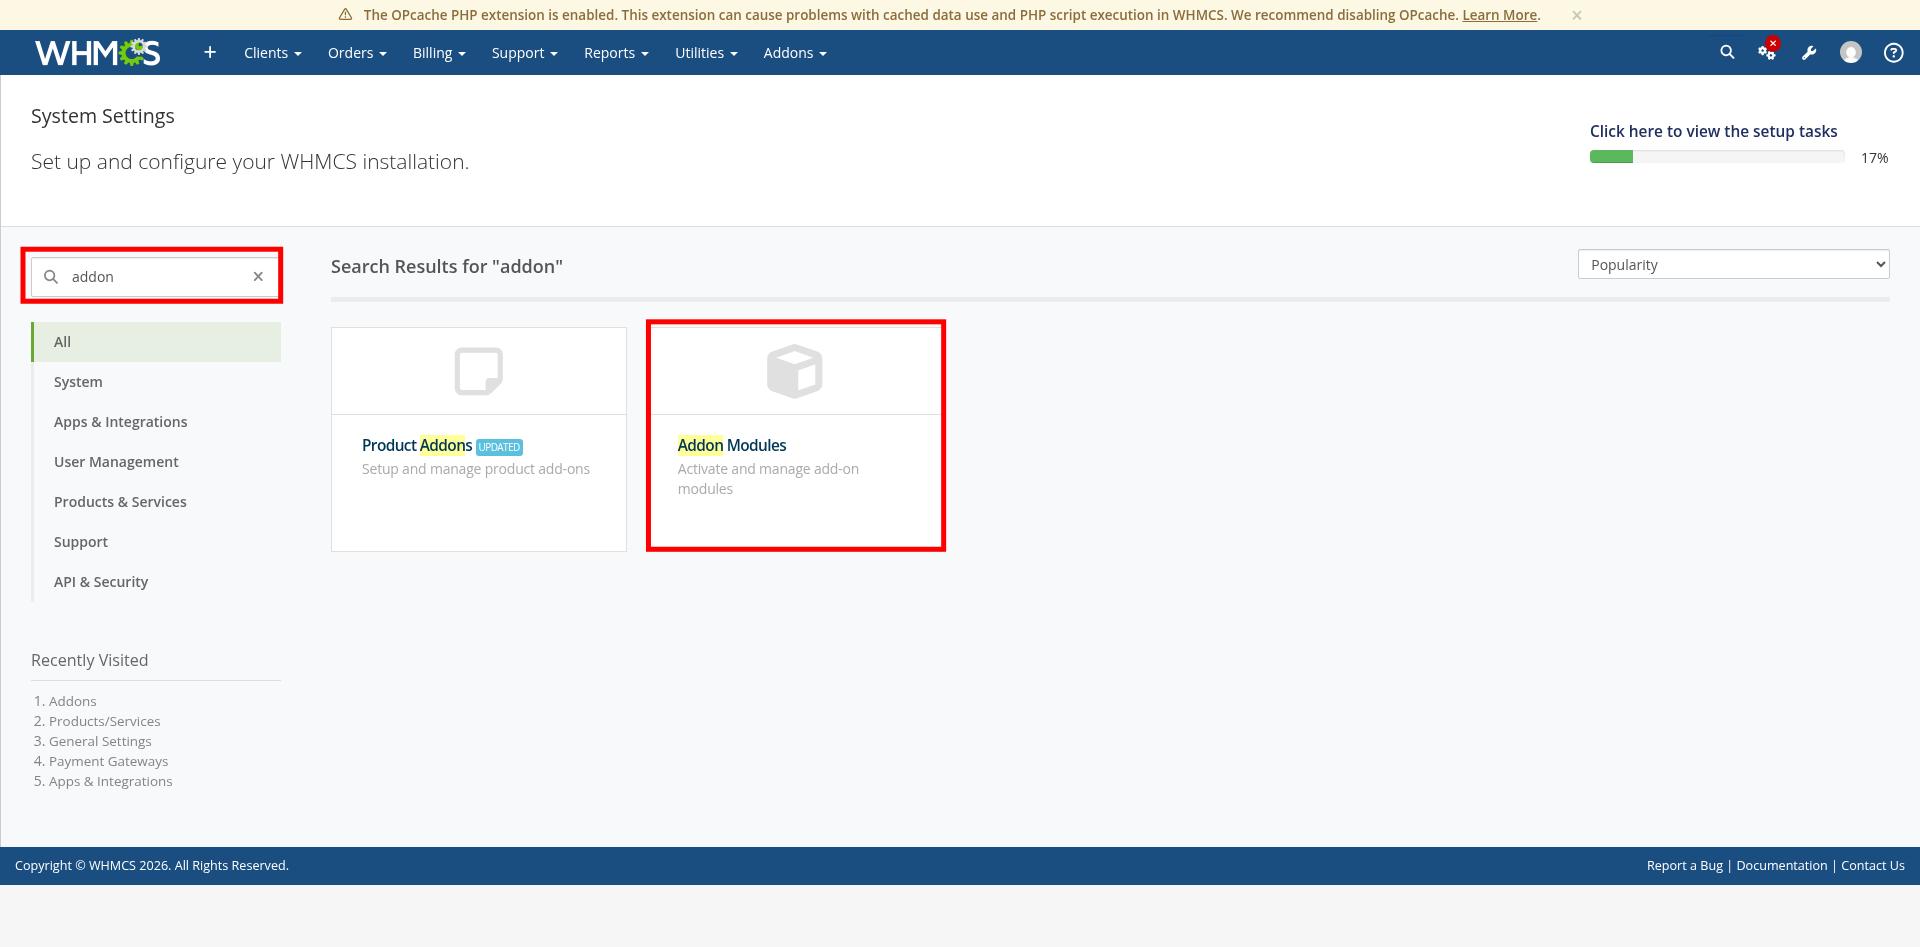
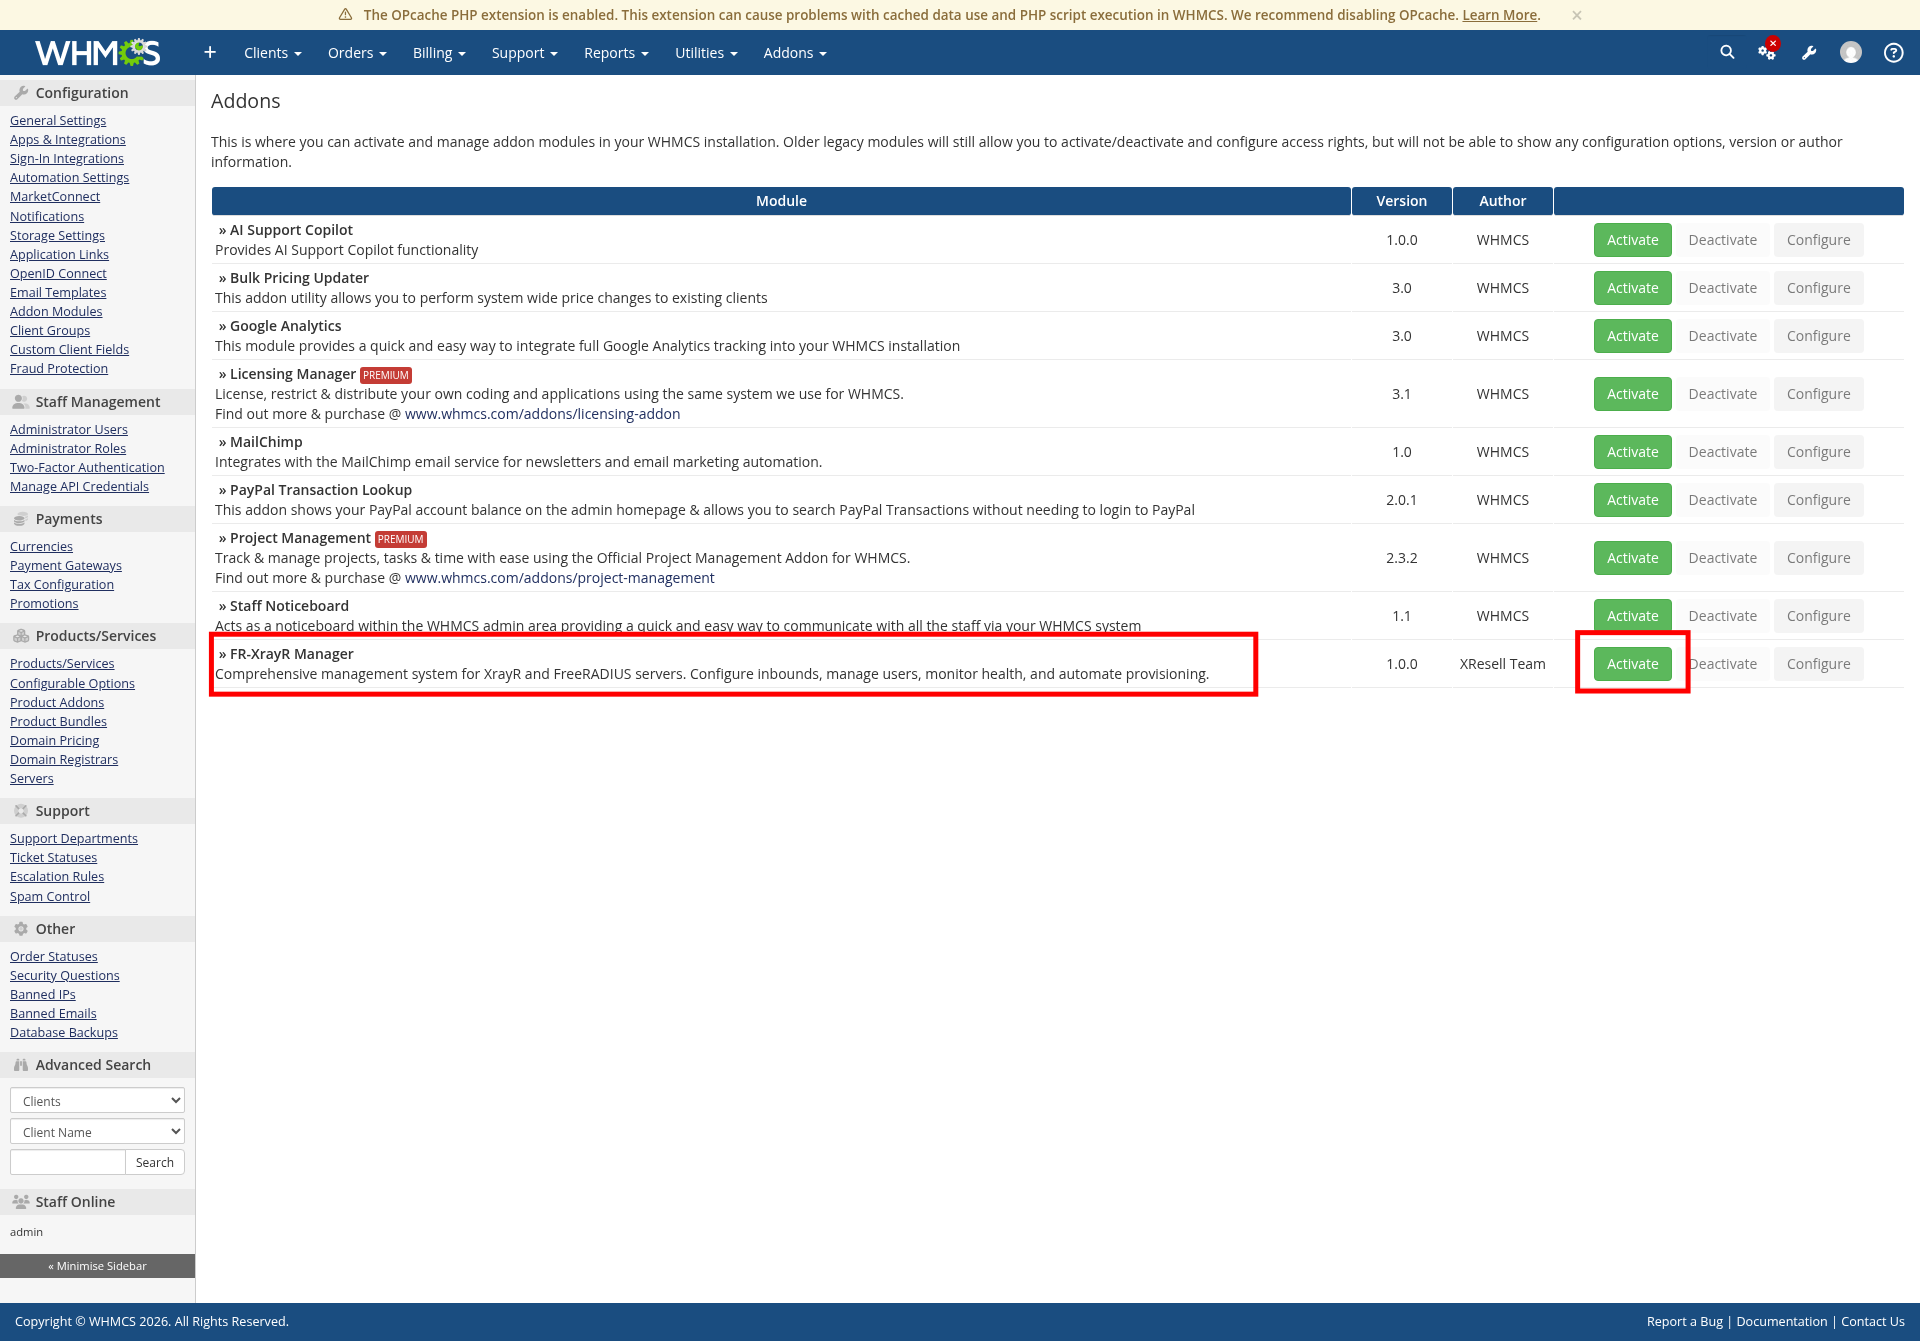
Step 1: Navigate to Addon Modules
In your WHMCS admin panel, go to System Settings. Type "addon" in the search box and click Addon Modules.
Step 2: Activate FR-XrayR Manager
Find FR-XrayR Manager in the addon modules list and click the green Activate button to enable the module.
Step 3: Configure the Module
After activation, the module settings will expand. Fill in the required fields:
- License Key — enter the license key from your purchase
- Encryption Key — a key for encrypting stored credentials (do not change after initial setup)
- Access Control — select which admin roles can access the module
Click Save Changes when done.
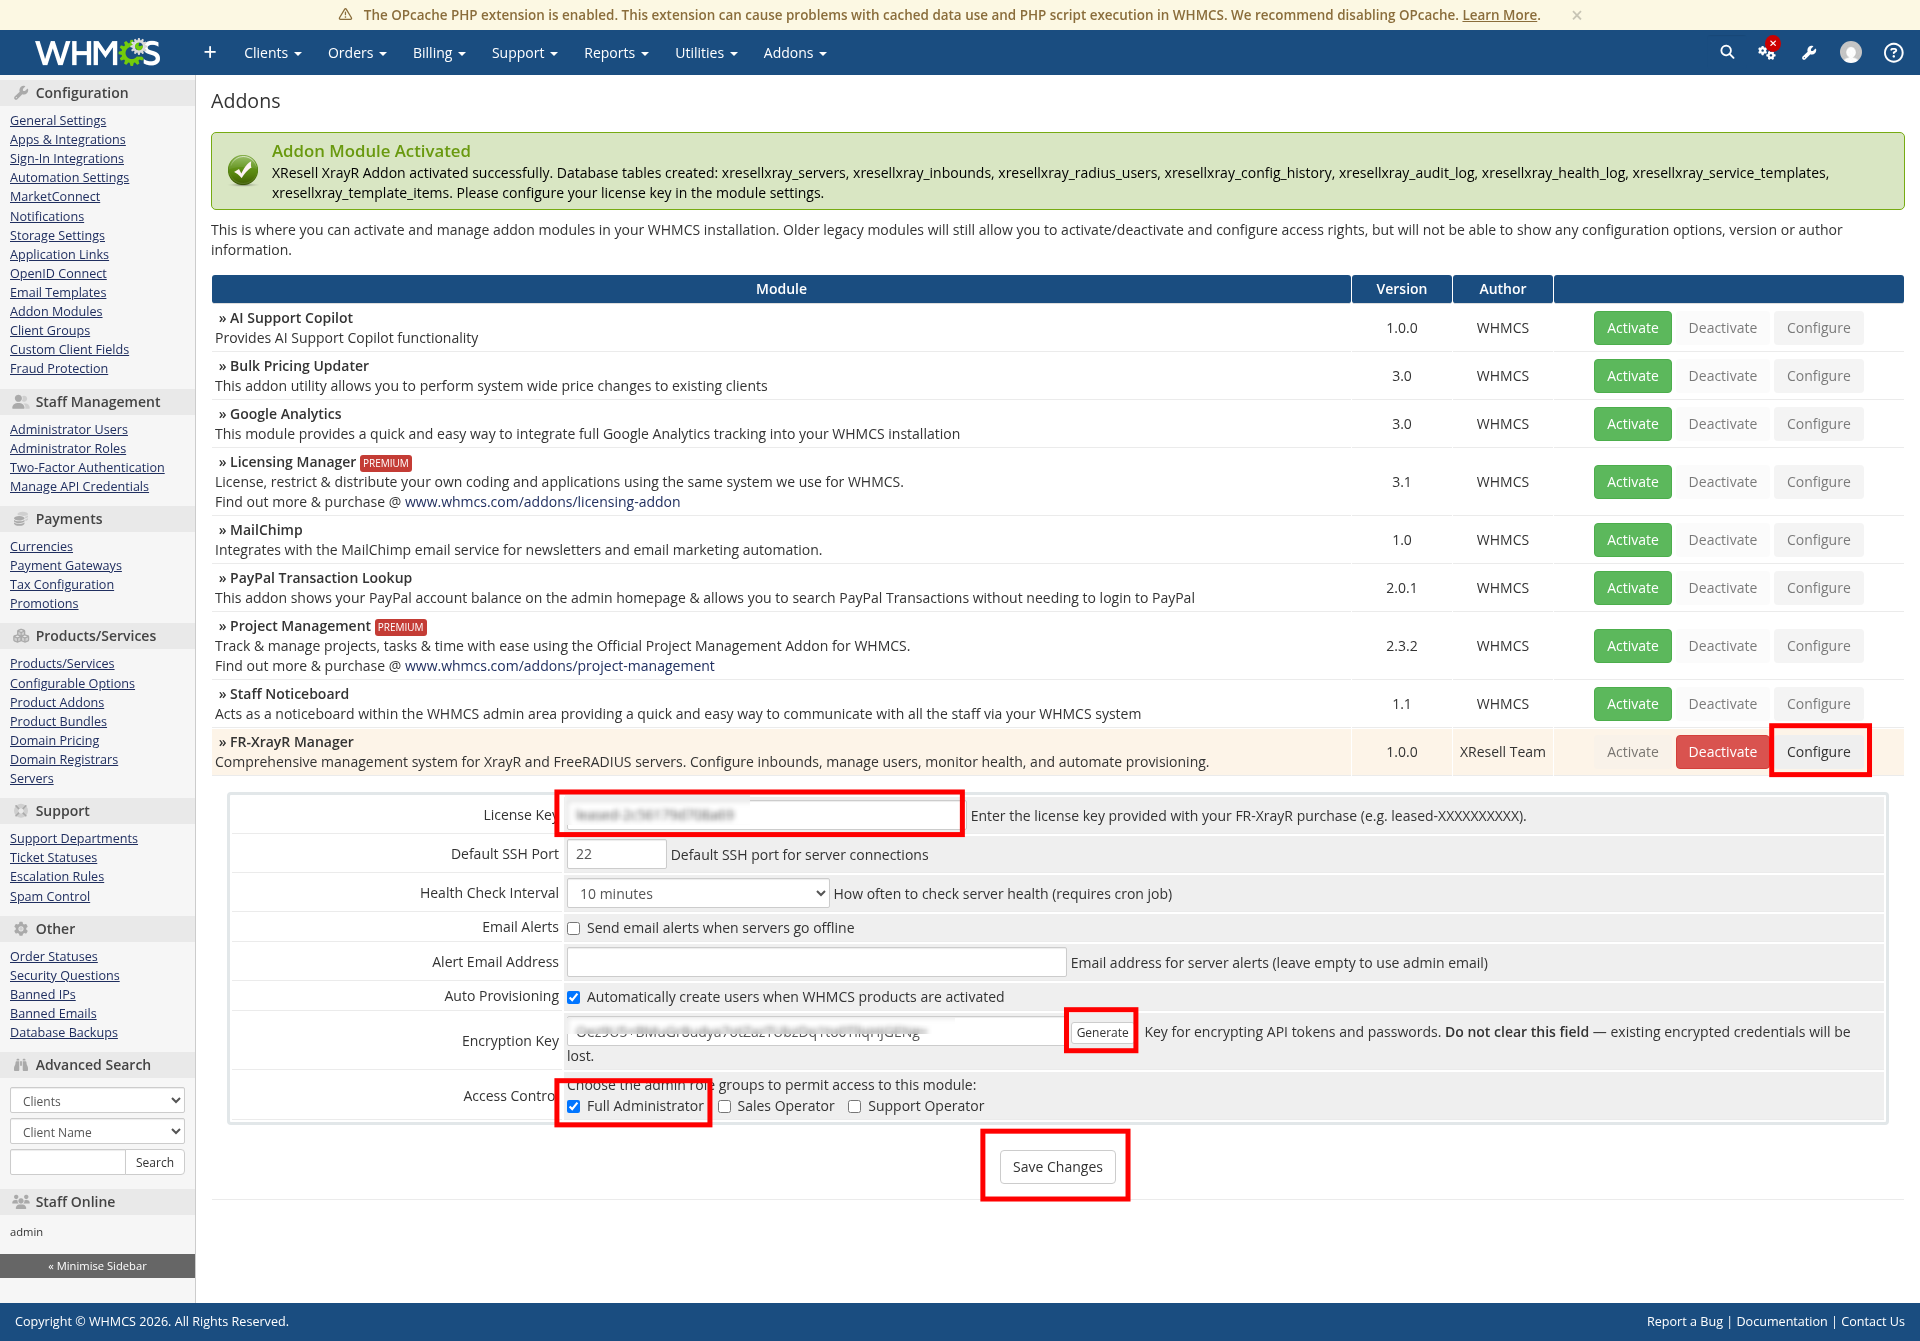
Important: The encryption key is used to encrypt all stored SSH passwords and API tokens. Keep it safe and do not change it after servers have been added, or you will lose access to stored credentials.
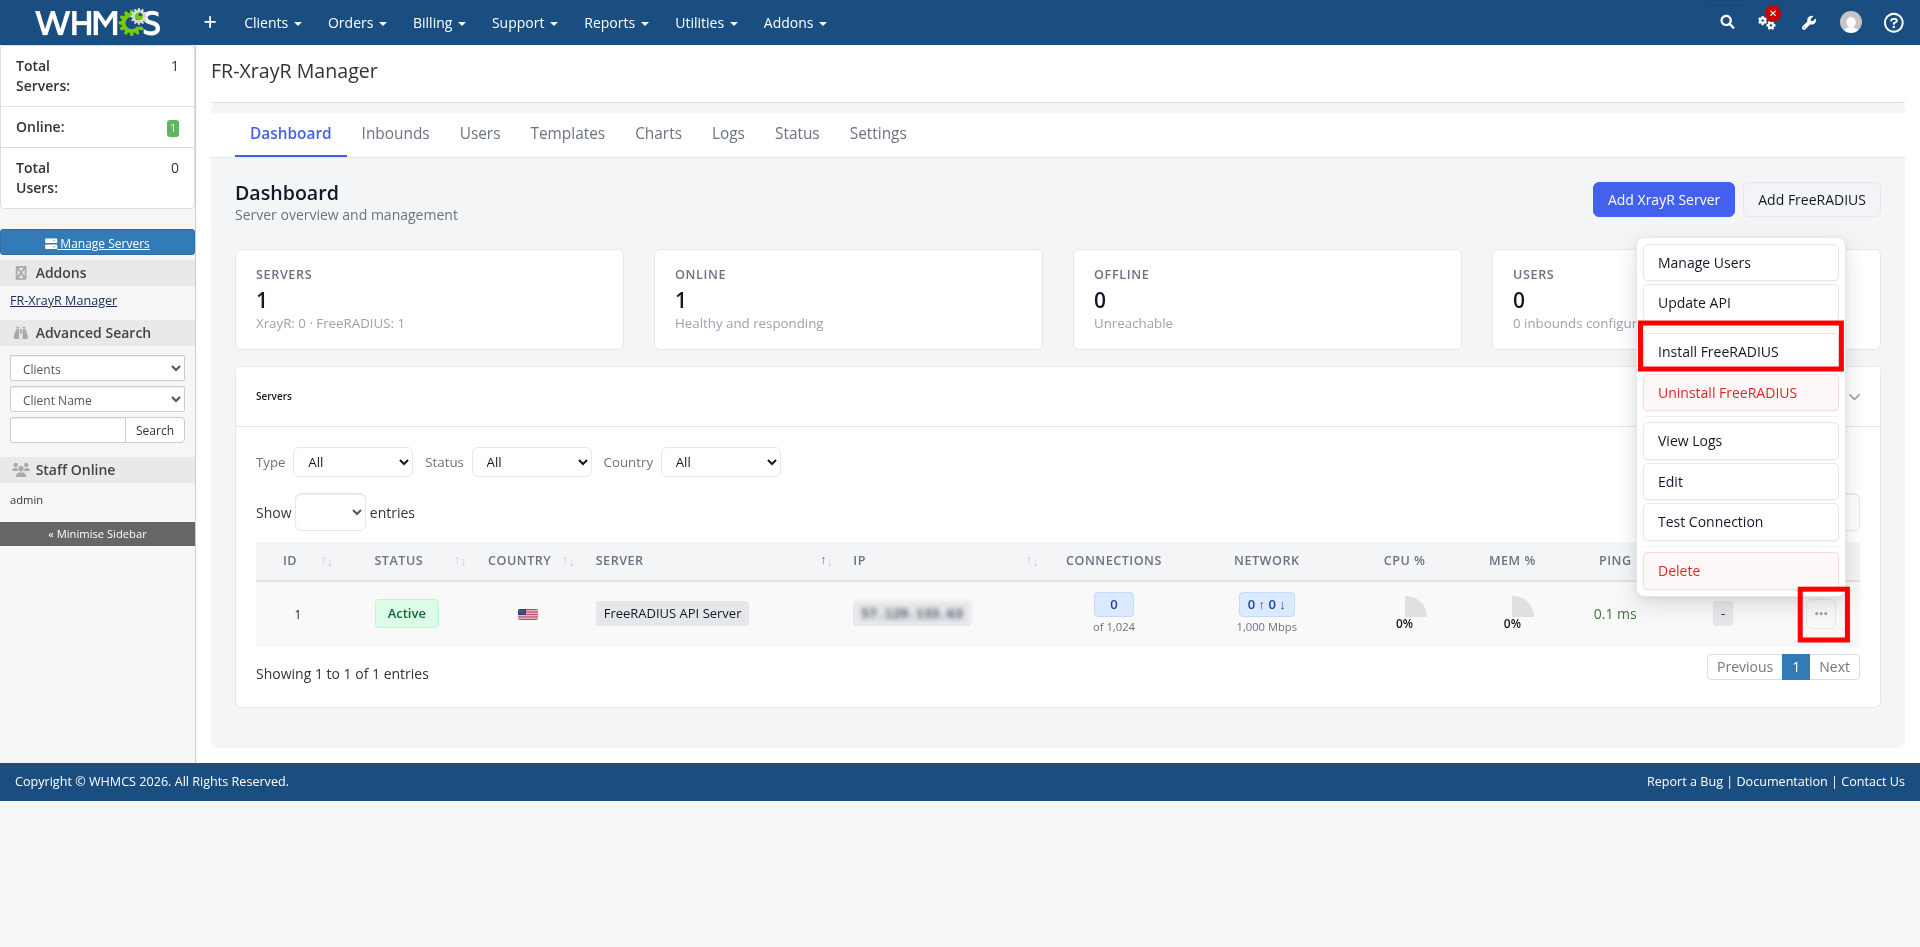
Step 4: Install FreeRADIUS on Your Server
After activation, the FR-XrayR Manager dashboard appears. Your FreeRADIUS server should already be listed. Click the three-dot menu (...) on the server row, then select Install FreeRADIUS.
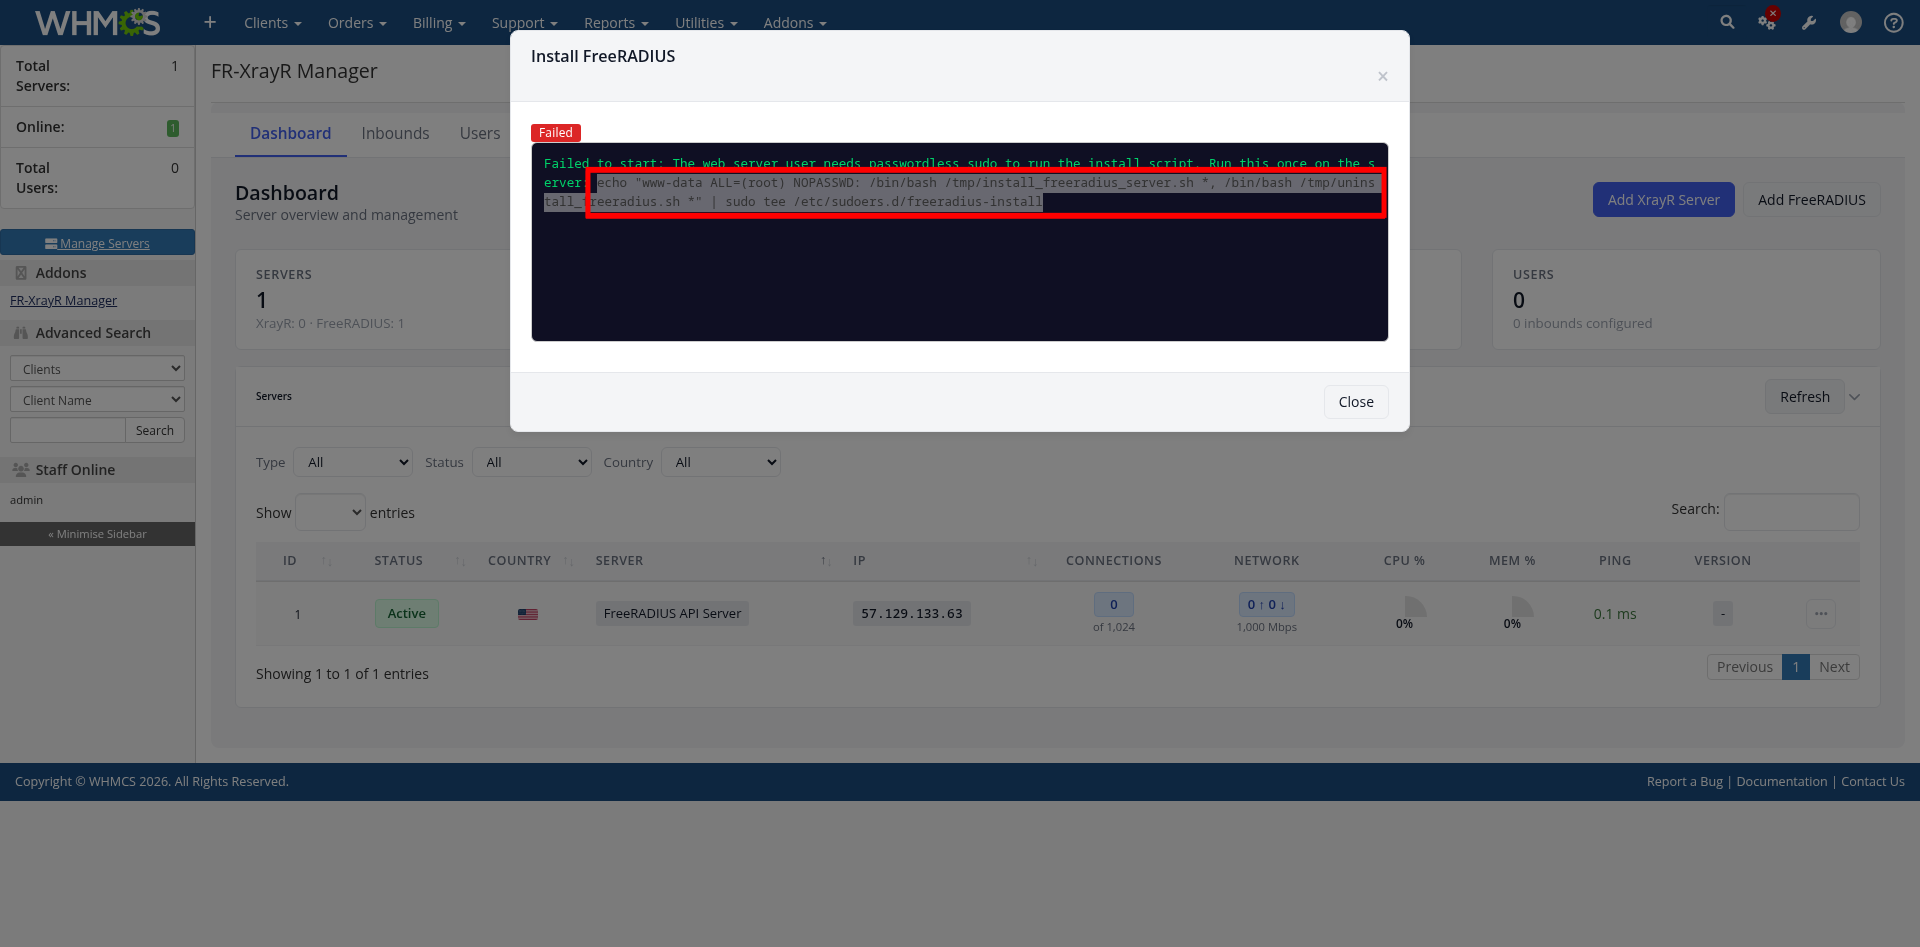
Step 5: Fix Passwordless Sudo (If Required)
If you see a "Failed" message, the web server user needs passwordless sudo access to run the install script. Copy the command shown in the error message and run it on your server via SSH:
echo 'www-data ALL=(root) NOPASSWD: /bin/bash /tmp/install_freeradius_server.sh *, /bin/bash /tmp/uninstall_freeradius.sh *' | sudo tee /etc/sudoers.d/freeradius-installAfter running this command, go back and click Install FreeRADIUS again.
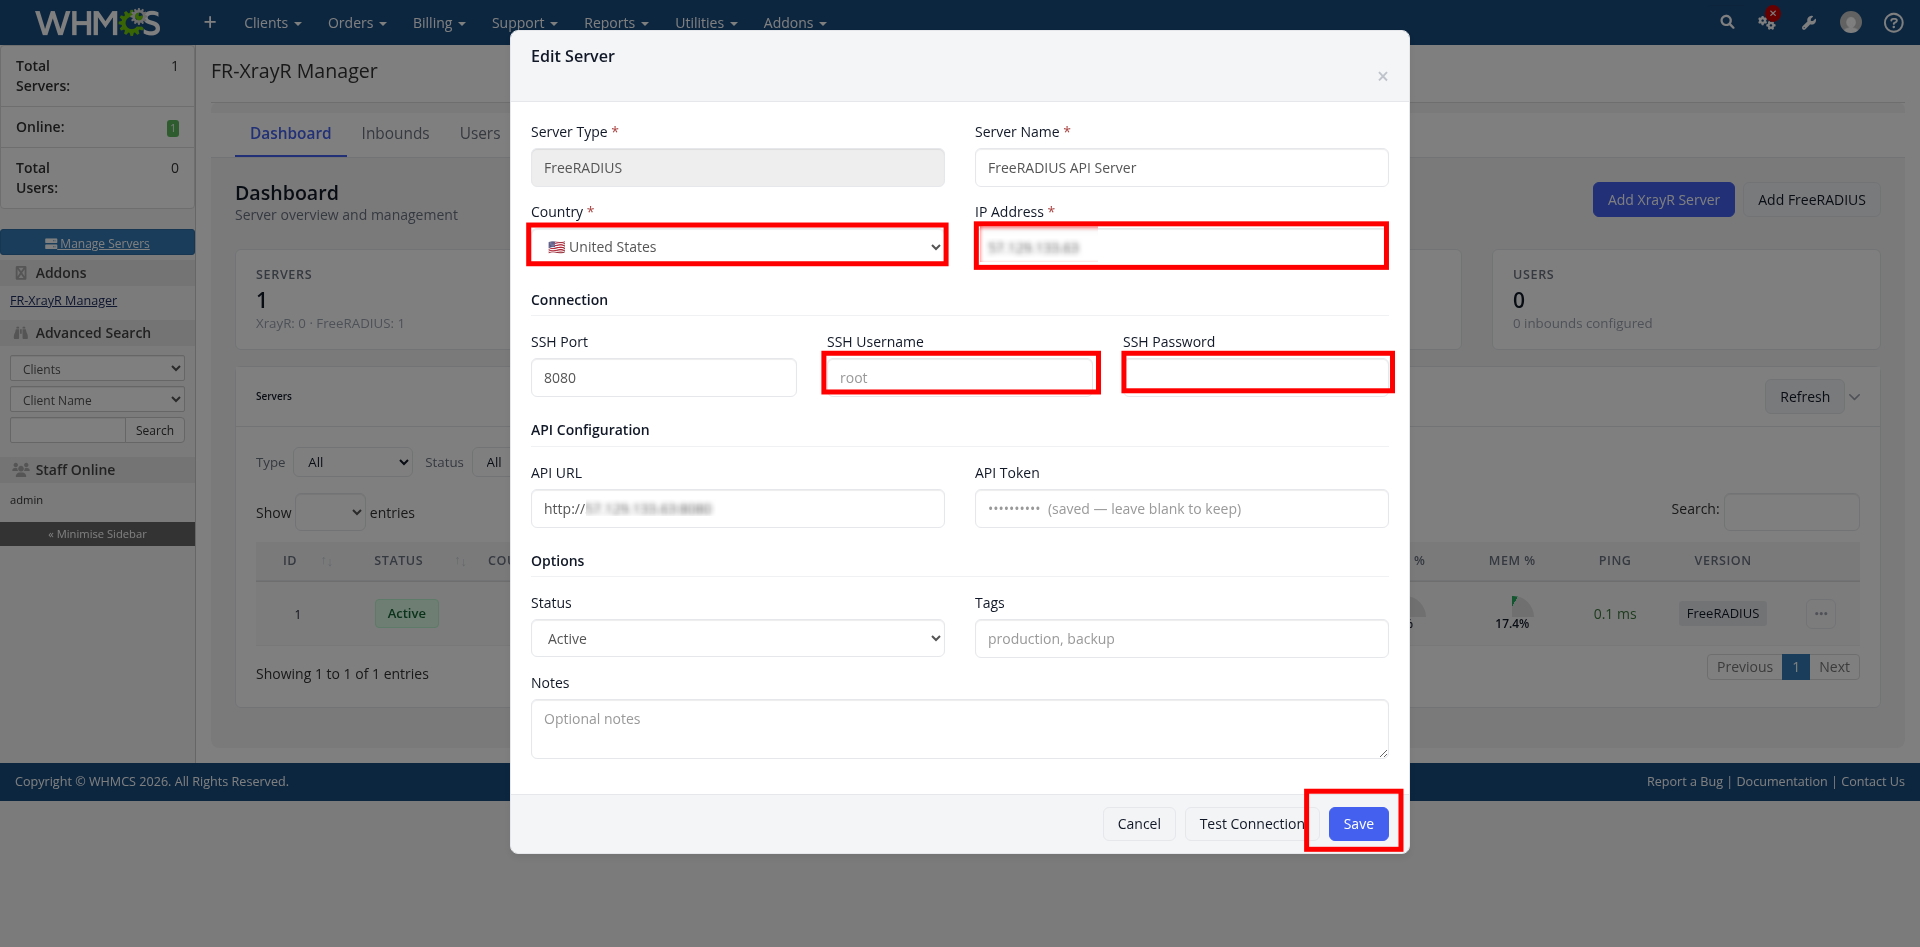
Step 6: Edit FreeRADIUS Server Details
Click the three-dot menu (...) on your FreeRADIUS server row and select Edit. Fill in the required connection details:
- Country — select the server's country
- IP Address — your FreeRADIUS server's IP
- SSH Port — default is 8080 for the API port
- SSH Username — typically
root - SSH Password — your server's SSH password
The API URL will auto-populate based on the IP address. Click Save.
Step 7: Save Server Configuration
Verify all fields are filled in correctly, including the Country, IP Address, SSH Username, and SSH Password. The API URL and token fields will be pre-filled. Click Save to store the configuration.
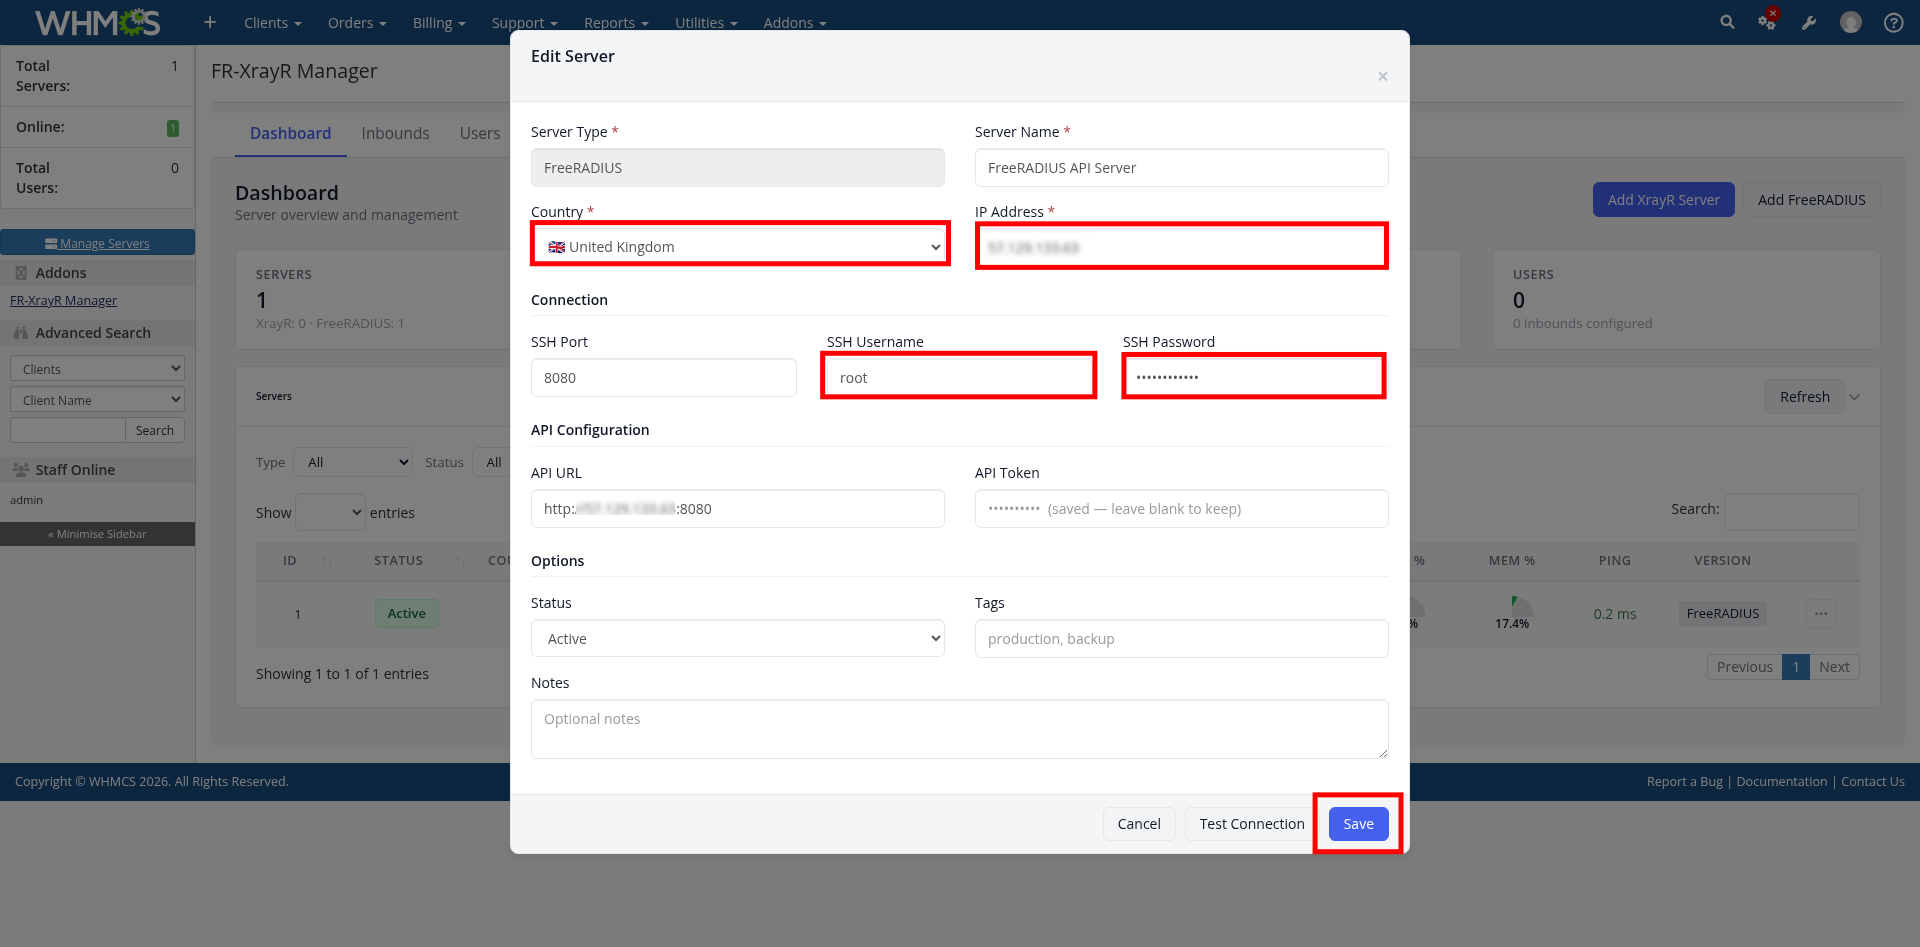
Tip: Use the Test Connection button to verify SSH connectivity before saving.
Step 8: Add an XrayR Node Server
Click the Add XrayR Server button on the dashboard. Fill in the server details:
- Server Name — a friendly name for this node (e.g., XRAY3)
- Country — select the node's country
- IP Address — the XrayR node's IP address
- SSH Port — typically
22 - SSH Username & Password — root SSH credentials
Check Install XrayR after adding to automatically install XrayR on the server. If using HTTPS, select Let's Encrypt as the certificate mode, then enter your Domain and Email. Click Add XrayR Server.
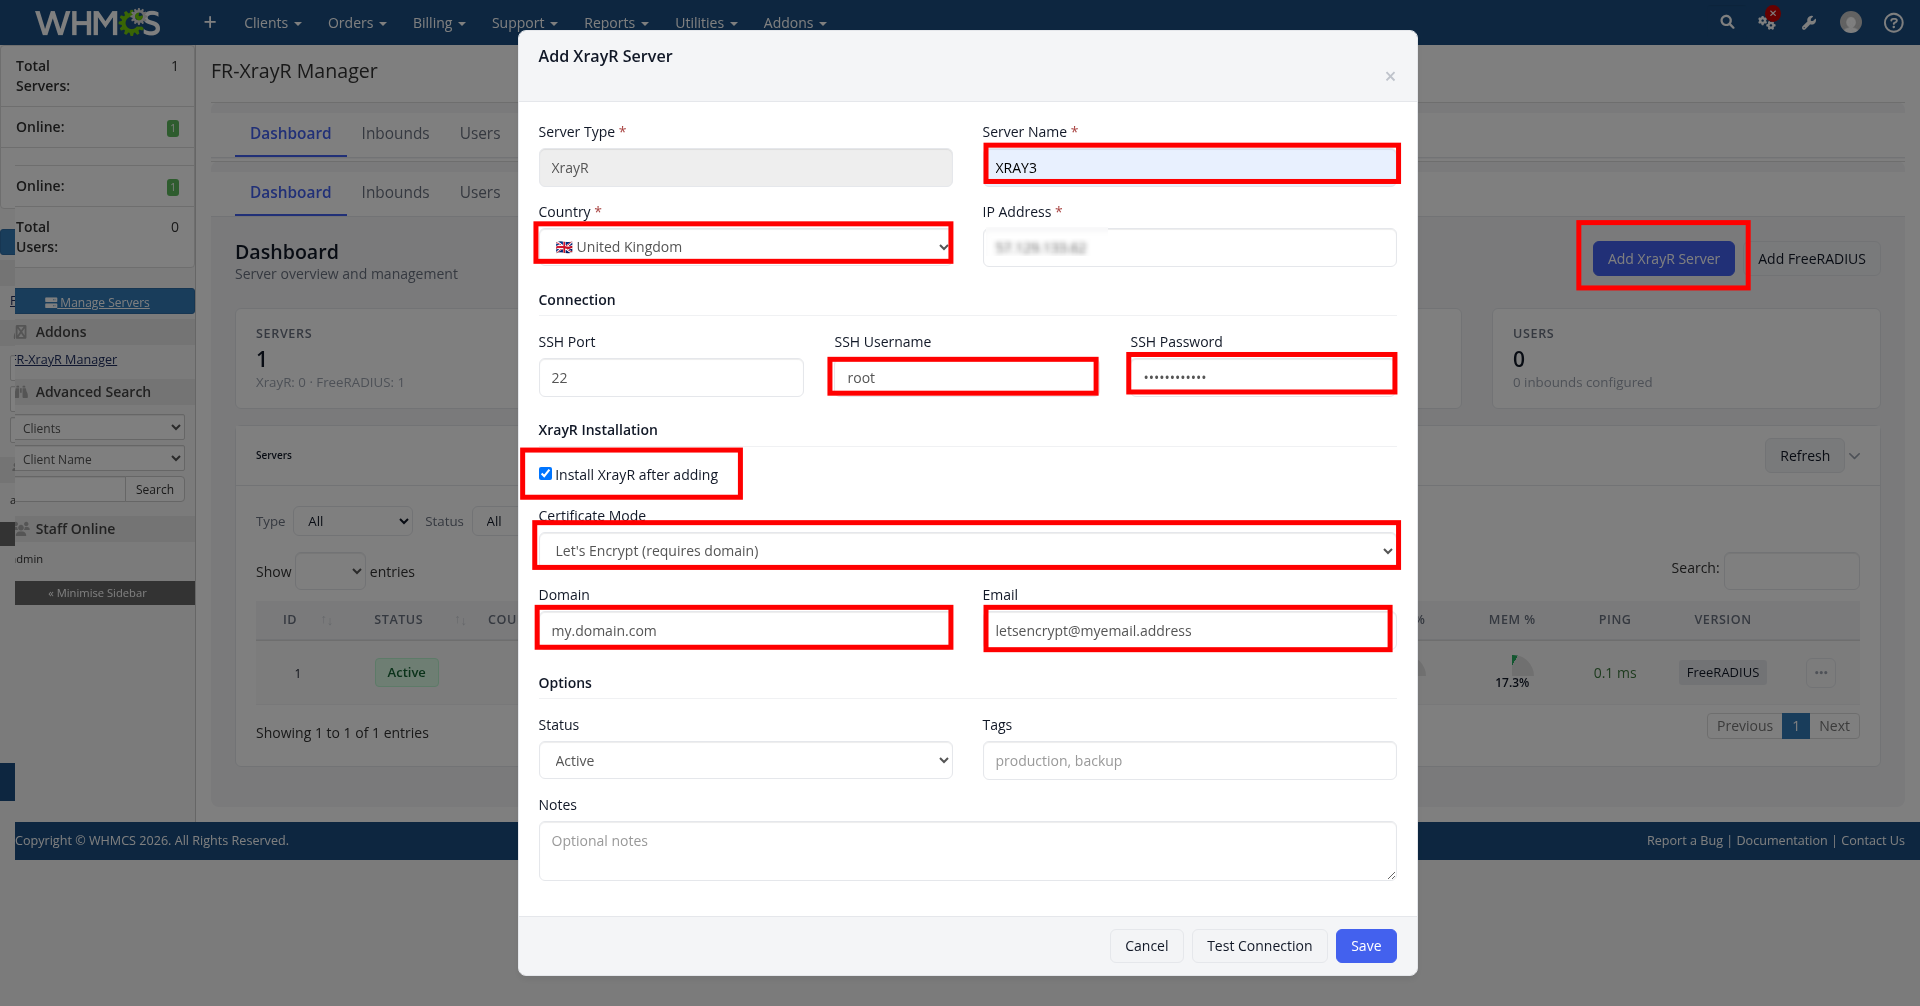
Tip: Make sure your domain's DNS A record points to the server's IP before using Let's Encrypt, otherwise certificate generation will fail.
Step 9: Monitor XrayR Installation
The installation log will open automatically, showing real-time progress. Wait for the installation to complete. This typically takes 2–5 minutes depending on your server's speed.
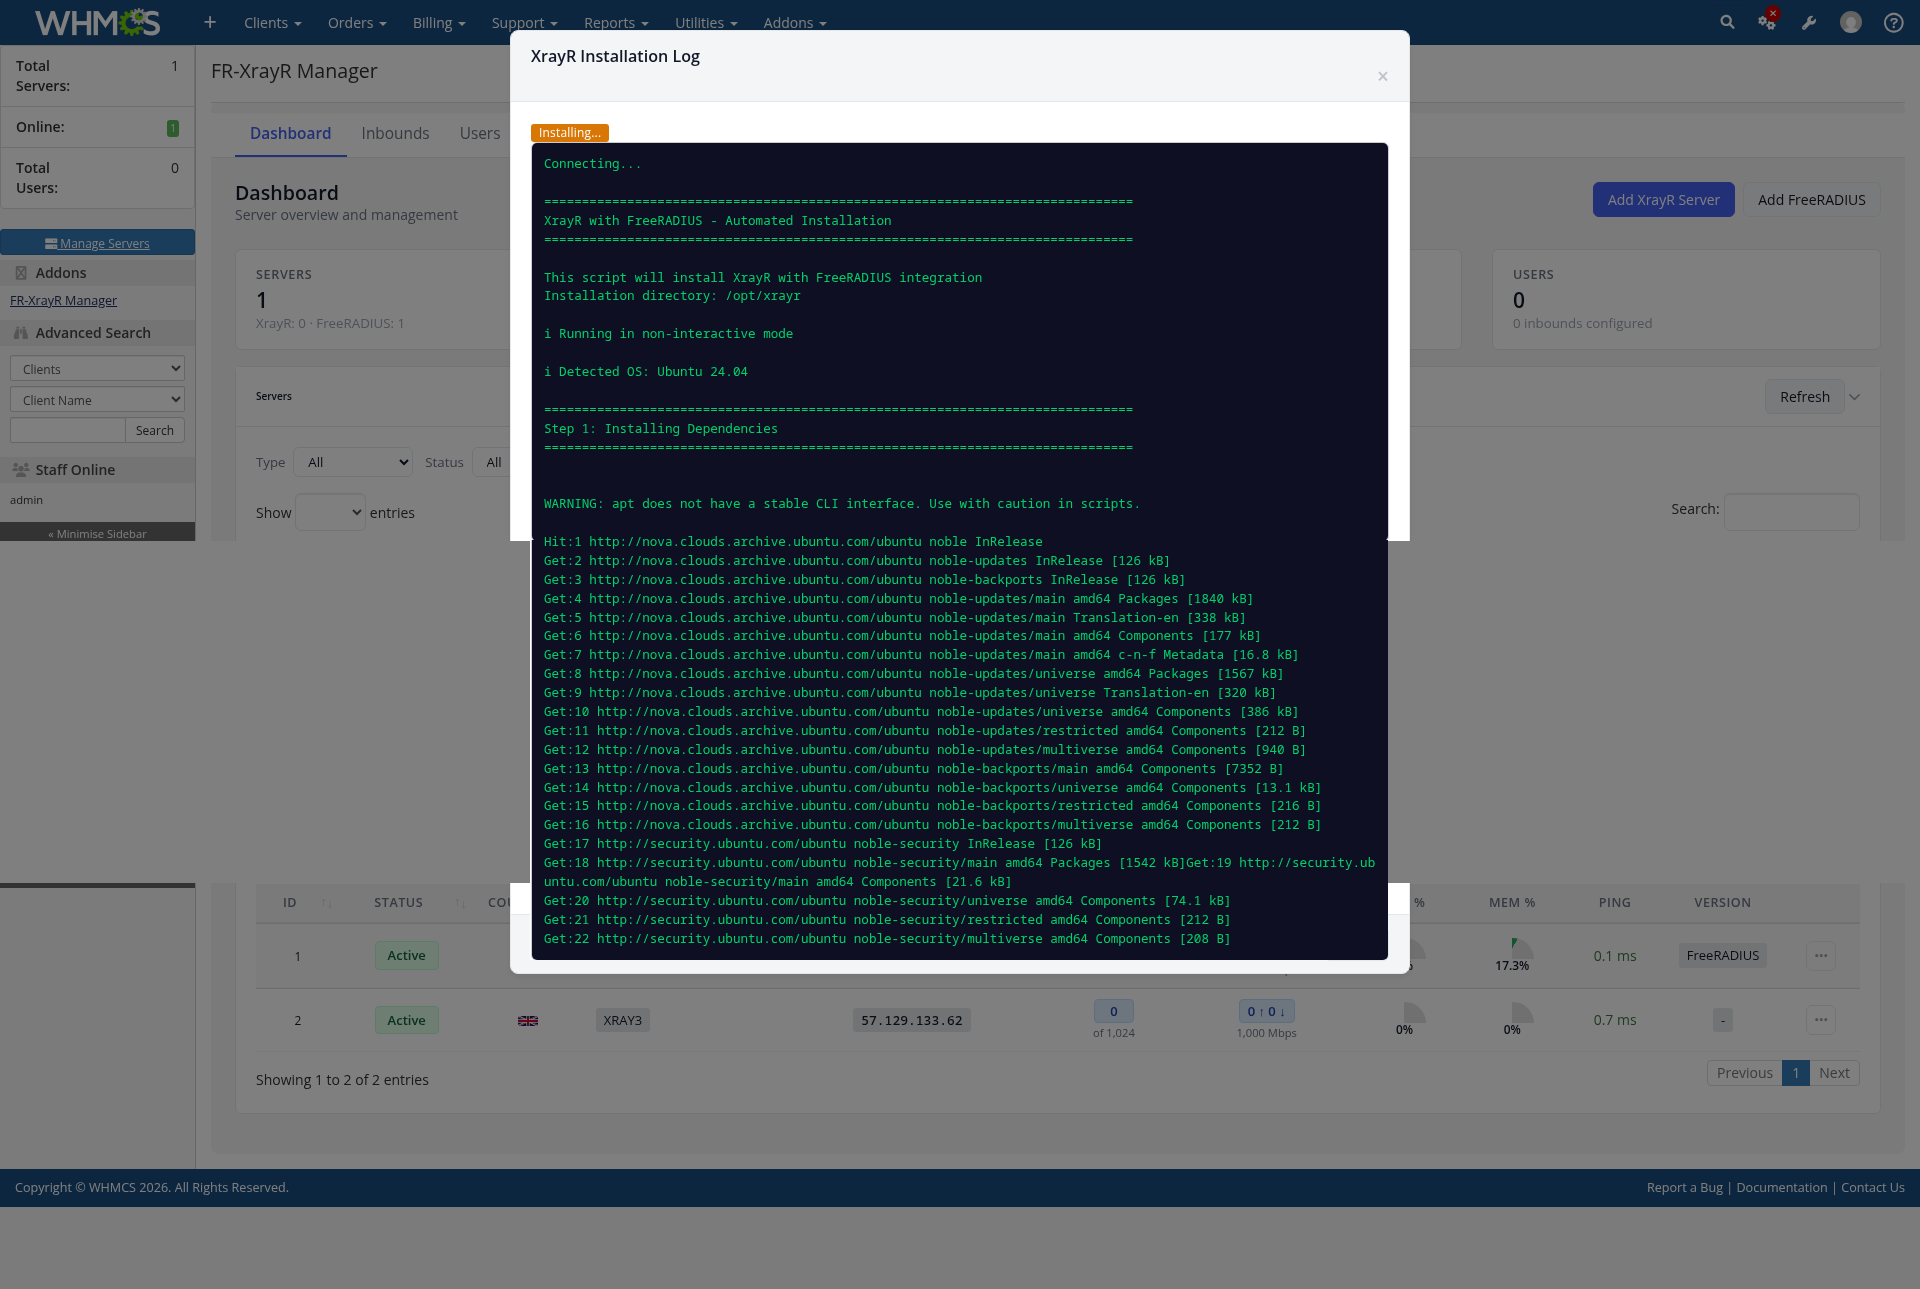
Do not close this window until the installation finishes. If it fails, check the log output for errors and ensure your server meets the minimum requirements (Ubuntu 20.04+ or Debian 11+).
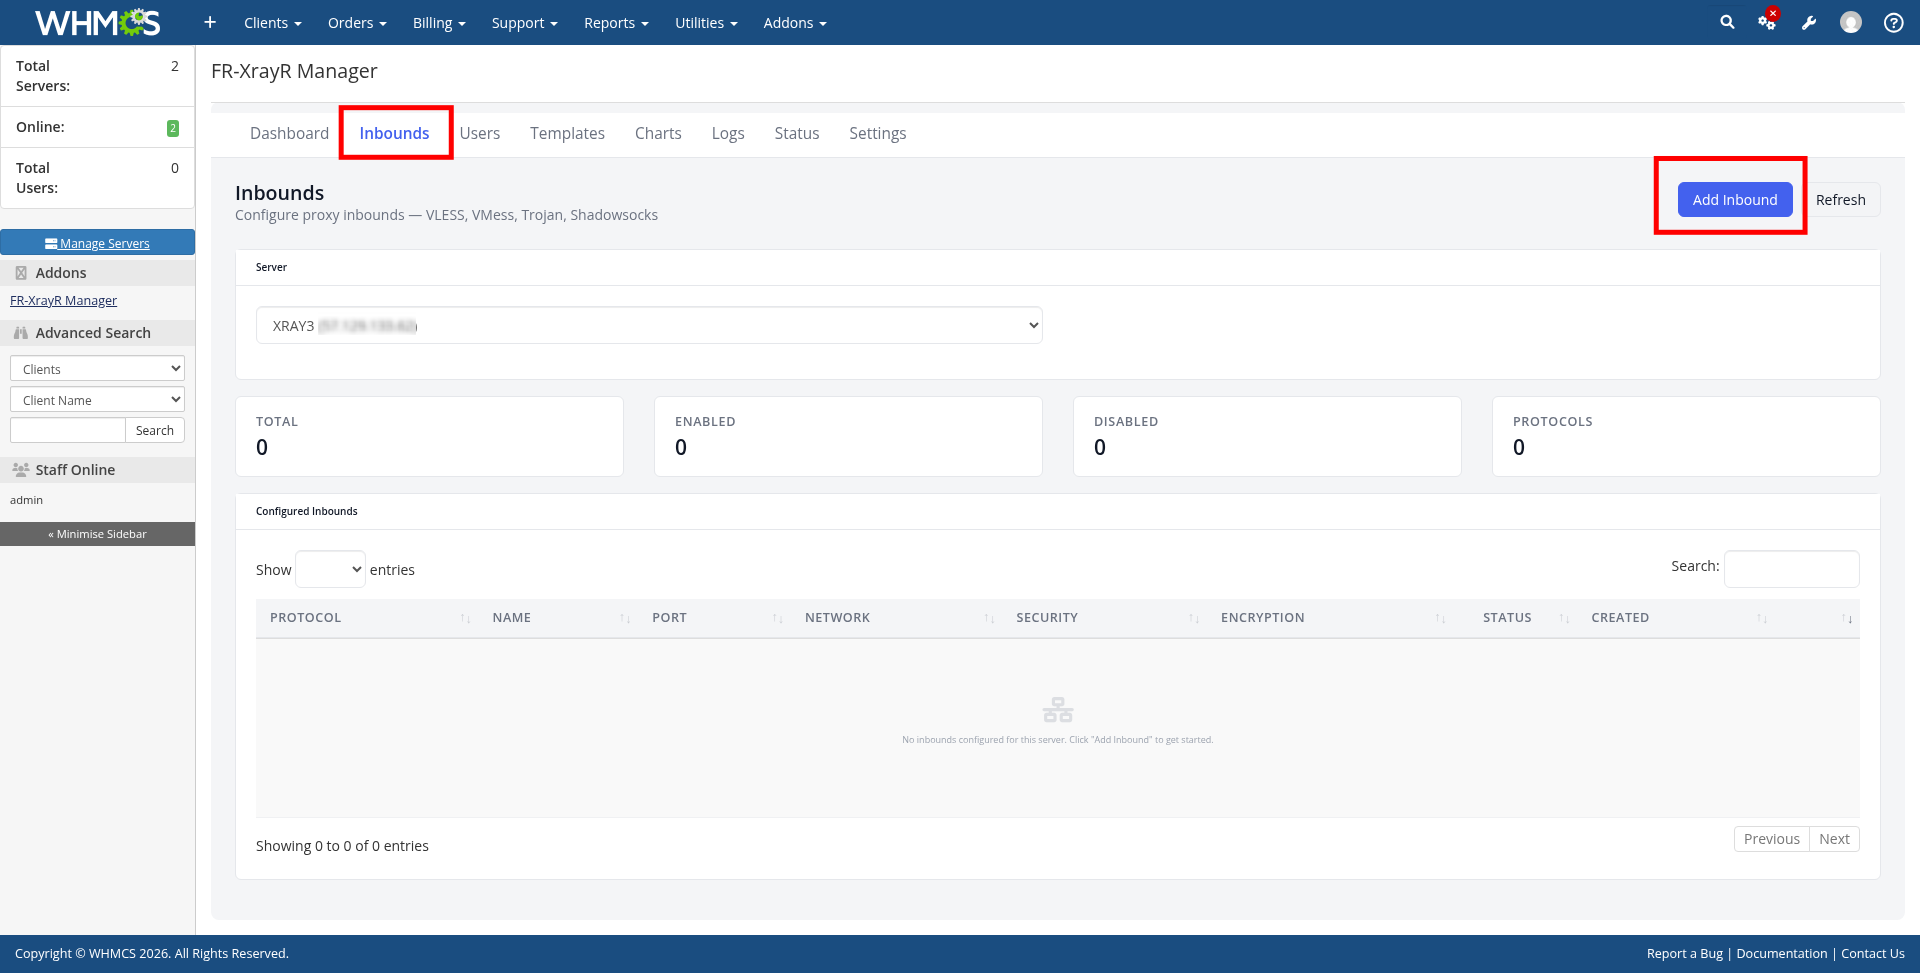
Step 10: Navigate to Inbounds
Once your XrayR server is installed, click the Inbounds tab. Select your XrayR server from the dropdown if not already selected. Click the Add Inbound button to create a new inbound configuration.
Step 11: Configure an Inbound
In the Add Inbound dialog, select a Preset to get started quickly. The recommended preset is VLESS + REALITY, which provides the best security and performance. The configuration fields and JSON preview will auto-populate. Click Add Inbound to save.
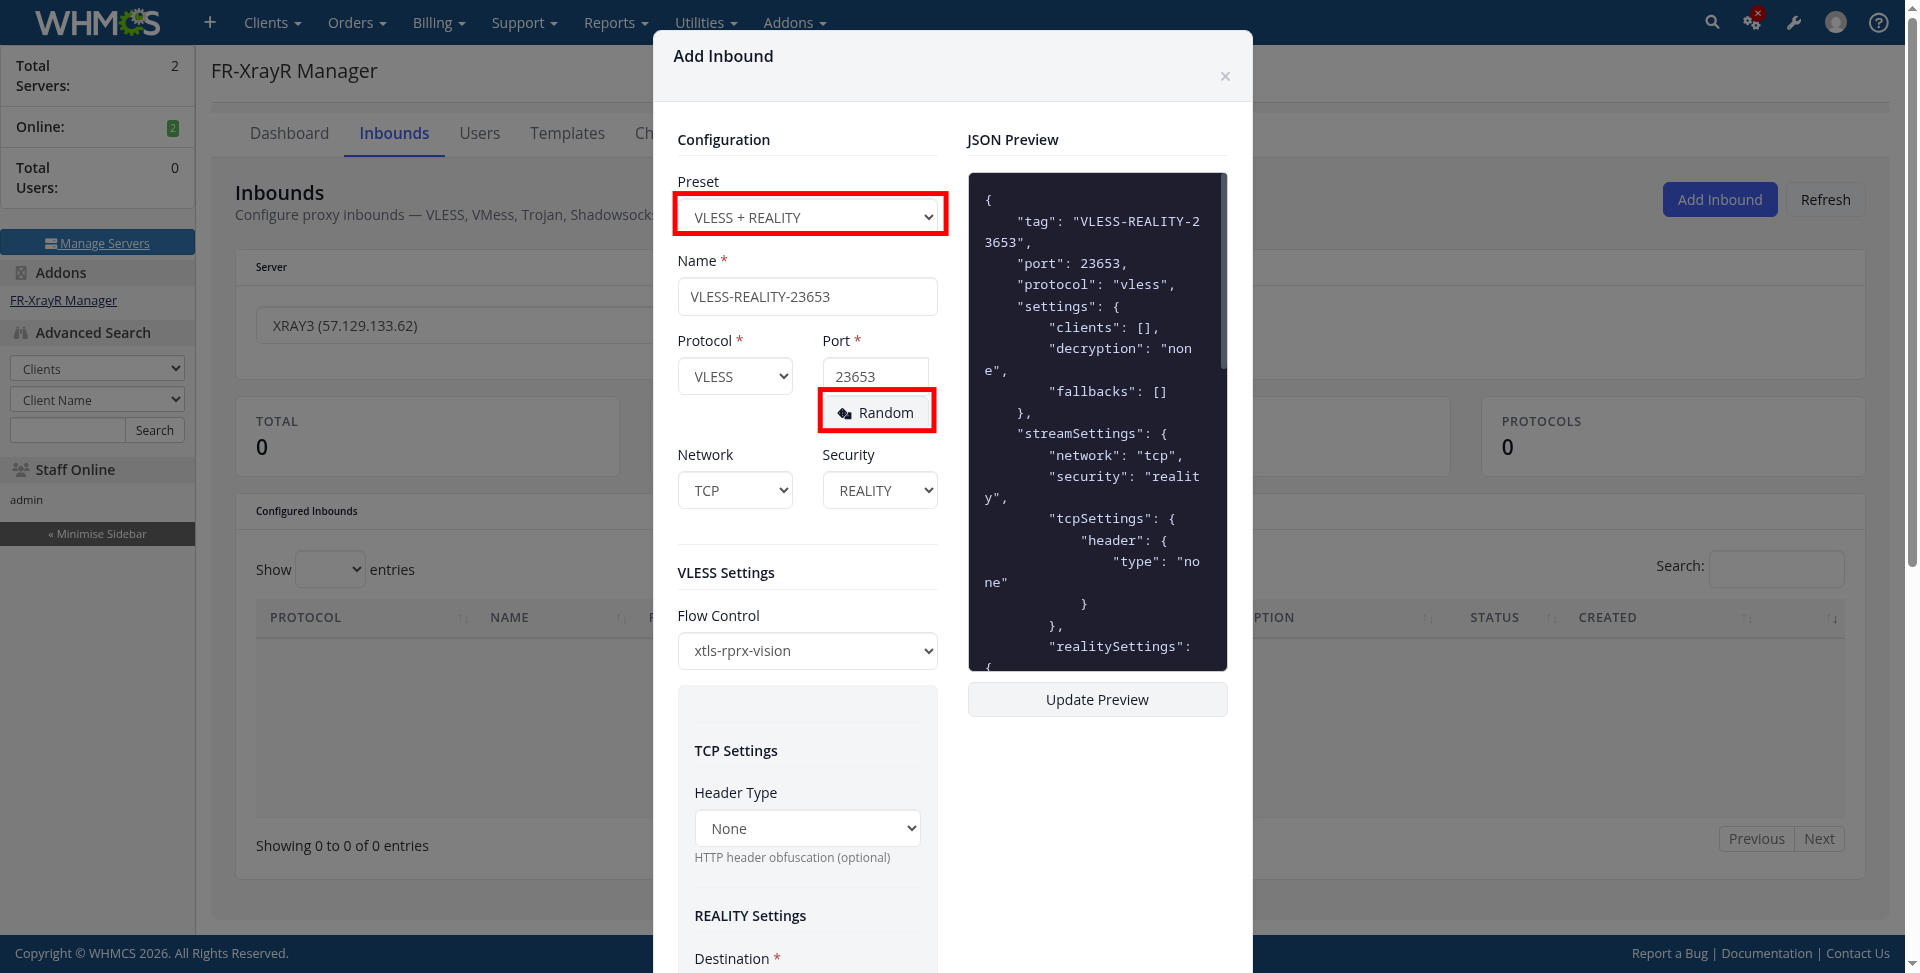
Tip: VLESS + REALITY is recommended because it doesn't require a domain or TLS certificate and provides excellent anti-detection capabilities.
Step 12: Navigate to Templates
Click the Templates tab. Templates group servers and inbounds into packages that can be assigned to WHMCS products. Click Add Template to create one.
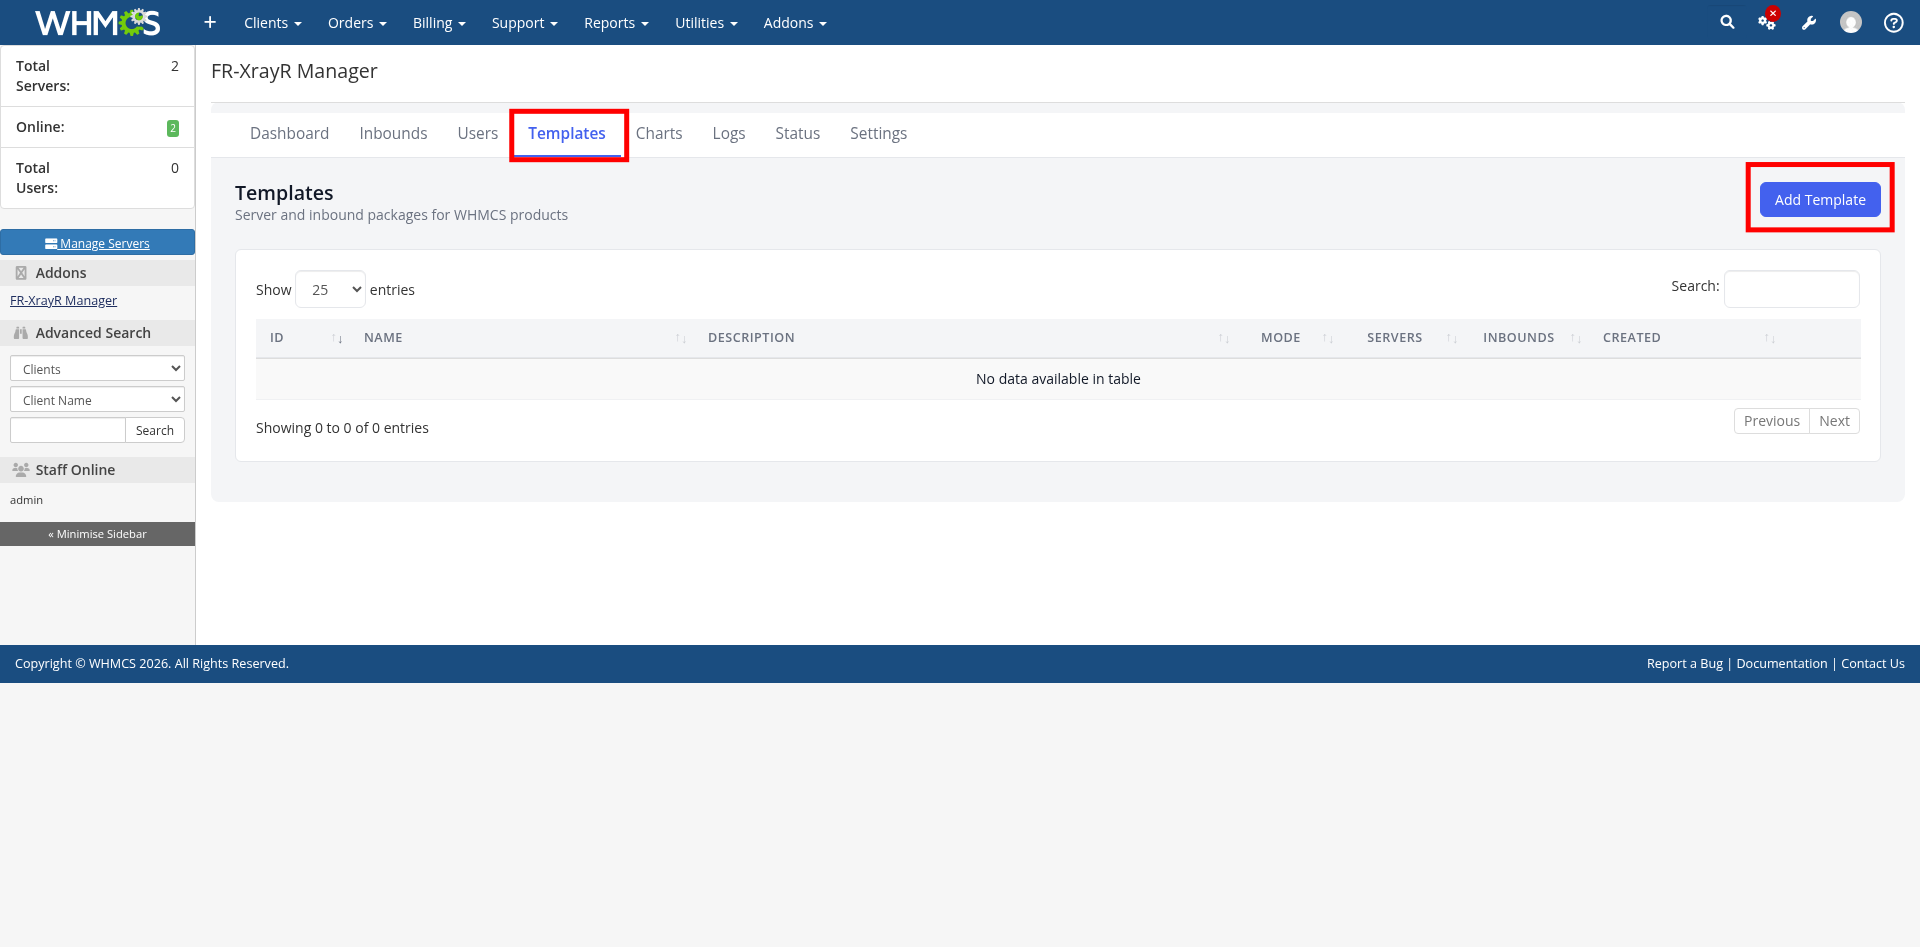
Step 13: Create a Template
Fill in the template details:
- Name — a descriptive name (e.g., "VPN-Template-1")
- Description — optional description
- Auto-include all synced inbounds — check this to automatically include new inbounds when nodes are added
- Servers — select the XrayR servers to include in this template
Click Save to create the template.

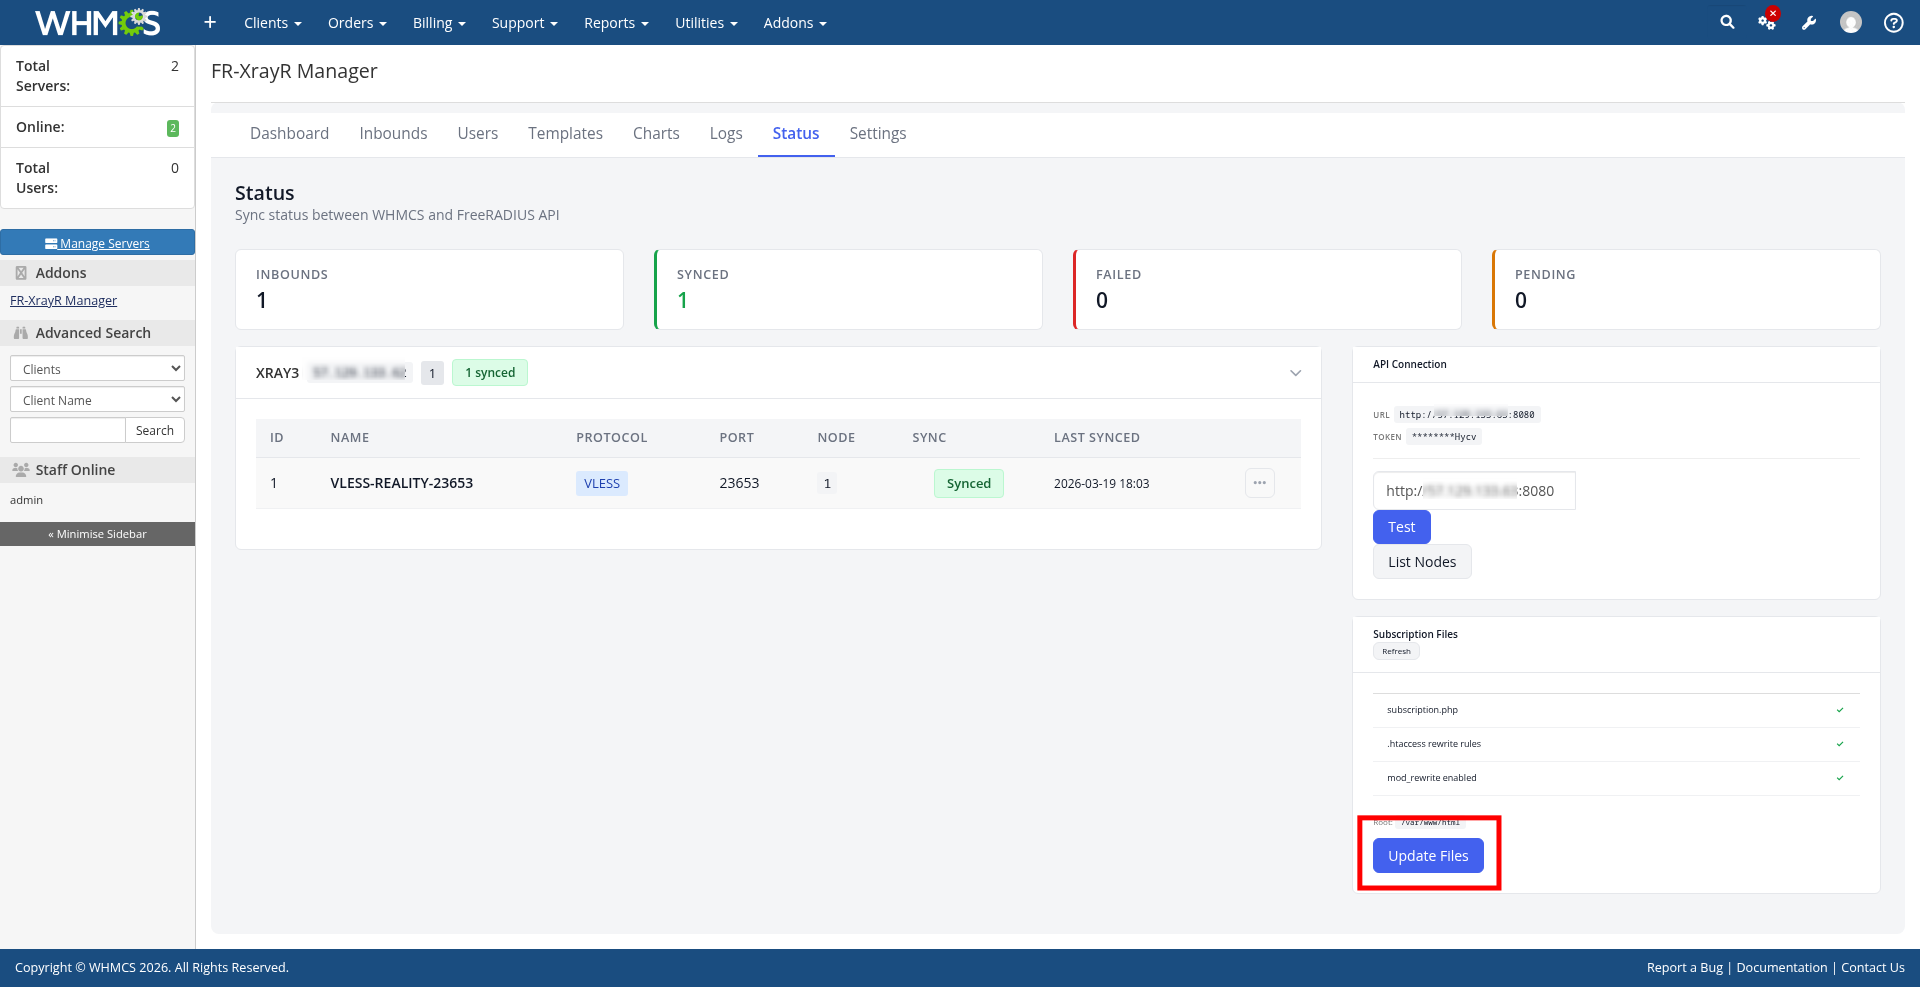
Step 14: Verify Sync Status & Update Files
Click the Status tab to verify that your inbounds are synced with the FreeRADIUS API. You should see:
- Inbounds and Synced counts matching
- Failed: 0 and Pending: 0
- API Connection showing the correct URL and token
- Subscription Files all showing green checkmarks
Click the Update Files button to deploy the subscription endpoint file to your WHMCS installation.
Step 15: Link Template to a WHMCS Product
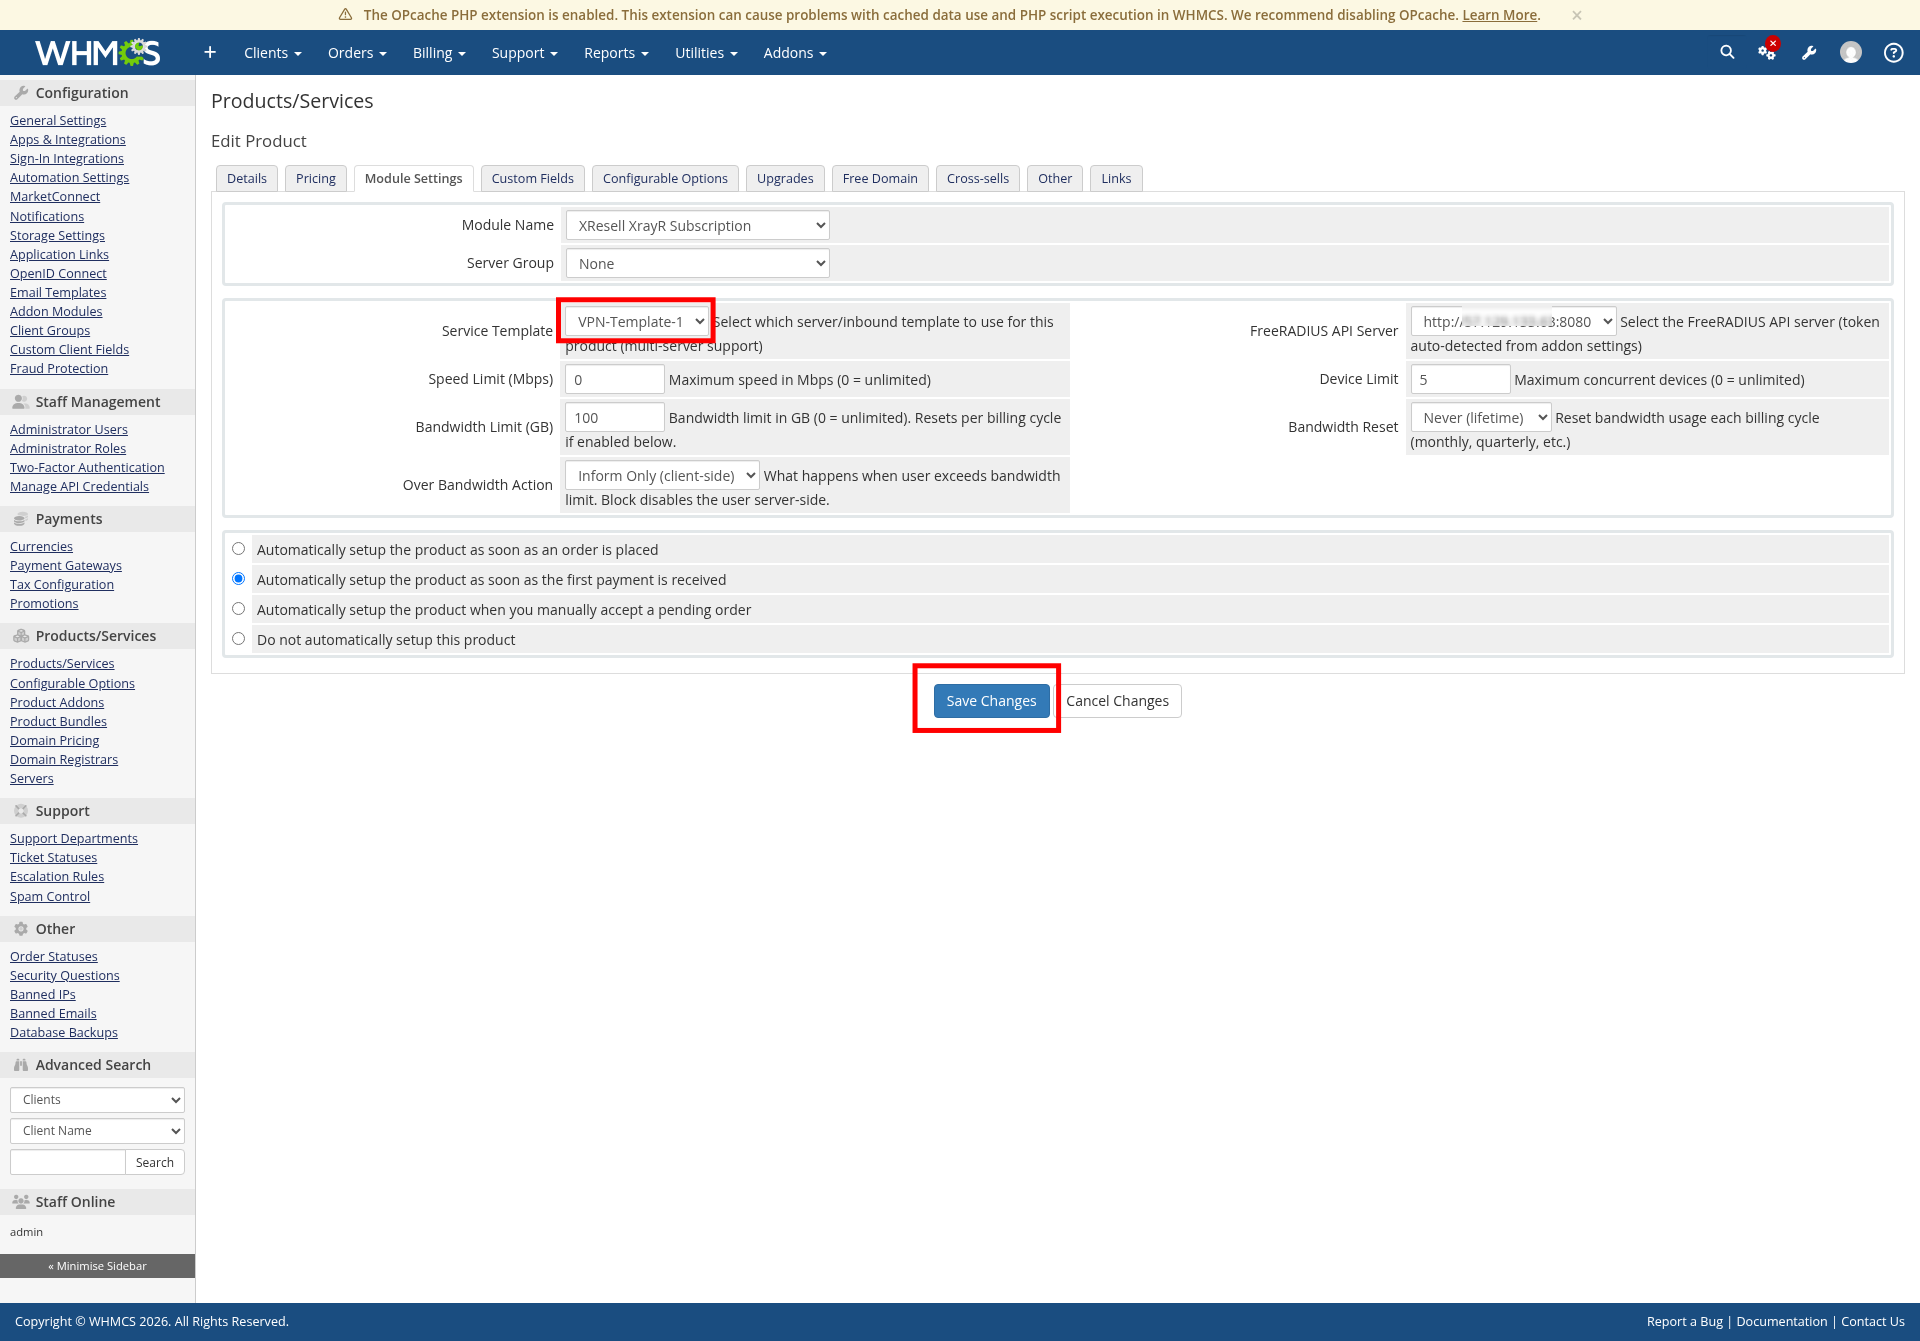
Go to Products/Services in WHMCS and edit the product you want to use with FR-XrayR. On the Module Settings tab:
- Module Name — select "XResell XrayR Subscription"
- VPN Template — select the template you created
- FreeRADIUS API Server — auto-detected from addon settings
- Speed Limit (Mbps) — set maximum speed (0 = unlimited)
- Bandwidth Limit (GB) — set monthly bandwidth cap (0 = unlimited)
Click Save Changes. New orders for this product will now automatically provision VPN accounts.
Installation Complete! FR-XrayR Manager is now fully configured. New customer orders will automatically create VPN accounts with subscription links.